Whimsical handmade jewelry brings a magical, storybook charm to personal fashion. Characterized by playful motifs, fairy-tale aesthetics, delicate pastel tones, organic textures, and imaginative combinations of materials, whimsical bracelets allow you to wear a piece of fantasy on your wrist. Whether you are drawn to cottagecore forest aesthetics, ethereal celestial themes, mermaid-inspired ocean hues, or nostalgic vintage charm, crafting your own whimsical bracelets offers endless creative fulfillment.
Below is a comprehensive guide featuring 20 Aesthetic & Inspiring Whimsical Handmade Bracelet Ideas, complete with detailed concept breakdowns, step-by-step creation guides, crafting tips, variations, and complete material checklists.



1. Enchanted Moss & Dried Flower Glass Globe Bracelet
What This Idea Means
This fairy-core creation encapsulates real preserved green terrarium moss, tiny dried star flowers, and subtle gold leaf flecks inside miniature clear glass globe charms. Linked together on a delicate antique brass chain, it creates a wearable mini terrarium that brings enchantment to any outfit.
How to Make It
- Prepare Glass Orbs: Gather 5 to 7 small hollow glass globe charms featuring top opening holes.
- Fill the Globes: Using fine tweezers, carefully insert small tufts of preserved reindeer moss, tiny dried pink or white star flowers, and microscopic gold leaf flecks inside each orb.
- Seal with Metal Caps: Apply a tiny bead of two-part clear epoxy glue along the rim of a metal bell cap. Press the cap securely onto the glass orb opening and let it cure for 24 hours.
- Assemble the Strand: Cut a 6.5-inch piece of antique brass chain. Attach each filled glass orb cap to the chain links using 4mm brass jump rings, spacing them evenly.
- Attach Clasp: Fasten a brass lobster claw clasp and a small leaf charm to opposite ends of the chain.
Tips & Variations
- Tip: Ensure the dried flowers and moss are completely dry before sealing; any residual moisture can cause cloudiness inside the glass orb over time.
- Variation: Swap green moss for iridescent glitter and tiny star confetti for a celestial “galaxy in a jar” bracelet.
What You Need
- Hollow glass globe charms with metal bell caps (10mm size)
- Preserved green terrarium moss & dried micro star flowers
- Gold leaf flakes & clear two-part epoxy glue
- Antique brass cable chain, jump rings, & lobster clasp
- Fine tweezers & needle-nose pliers
2. Fairy-Core Raw Quartz & Butterfly Charm Wrap Bracelet
What This Idea Means
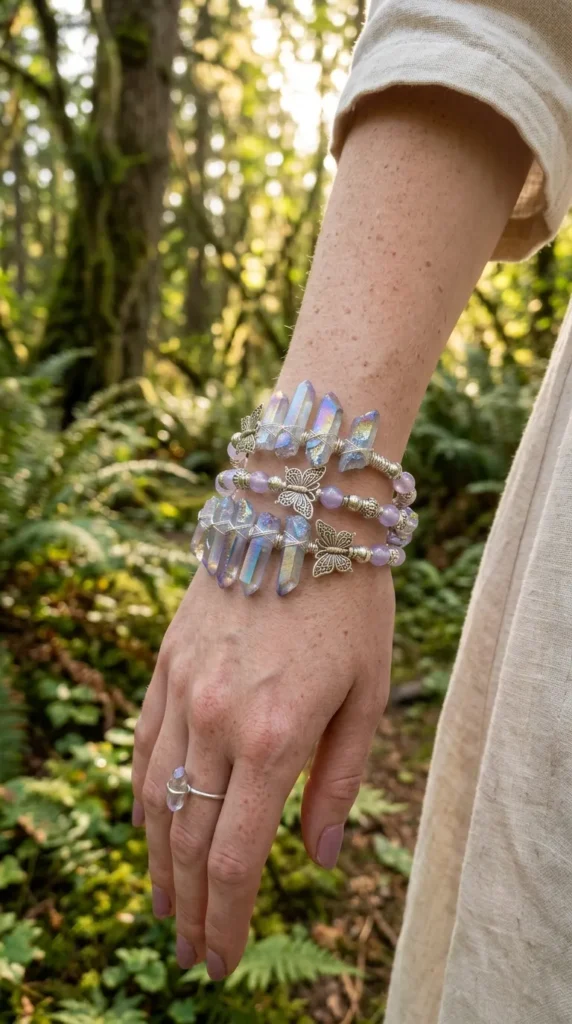
Combining organic crystal energy with delicate woodland beauty, this wrap bracelet wraps twice around the wrist. It features raw iridescent quartz points, delicate filigree butterfly charms, and soft pastel glass beads woven along a flexible metallic cord.
How to Make It
- Prepare Core Cord: Cut a 16-inch length of 0.8mm flexible silver-coated copper jewelry wire or memory wire coils.
- Wire-Wrap Quartz: Take 3 small raw quartz point crystals and wrap their upper ends with fine 26-gauge silver wire to form secure mounting loops.
- Pattern Assembly: Thread soft lavender, pale mint, and milky white glass seed beads onto the main wire.
- Integrate Charms: Insert a wire-wrapped quartz point every 2 inches, alternating with small hollow brass or silver butterfly charms attached via jump rings.
- Finish Ends: Form wrapped loops at both outer wire ends, attaching a silver extension chain and a bell charm for an adjustable closure.
Tips & Variations
- Tip: Use raw quartz pieces with natural opalescent or aura coatings to give the crystal facets a soft rainbow shimmer.
- Variation: Replace butterfly charms with detailed dragonflies or tiny mushroom pendants for a deeper forest-witch aesthetic.
What You Need
- Small raw aura quartz point crystals
- Filigree butterfly charms
- 0.8mm flexible wire & 26-gauge wrapping wire
- Pastel glass seed beads (Lavender, Mint, Milky White)
- Silver extension chain, lobster clasp, & pliers
3. Celestial Crescent Moon & Star Beaded Chain Bracelet
What This Idea Means
Inspired by magical night skies, this celestial bracelet features iridescent dark blue sandstone (goldstone) beads interspaced with dangling vintage-style gold crescent moons, starbursts, and tiny crystal teardrops.
How to Make It
- Prepare Bead Links: Thread deep blue 6mm sandstone beads onto individual gold eye pins, turning the open ends into wrapped loops.
- Link the Base: Connect 8 to 10 eye-pin bead units end-to-end to create a flexible 6-inch bead chain.
- Add Hanging Charms: Attach small brass crescent moon charms, starburst pendants, and clear crystal teardrops to the connecting jump rings between each bead link.
- Attach Centerpiece: Place a larger starburst charm directly in the middle of the strand to act as the primary visual focal point.
- Fasten Clasp: Attach a gold toggle clasp featuring a moon-shaped bar to lock the celestial theme together.
Tips & Variations
- Tip: Blue sandstone features millions of tiny metallic copper flecks inside the glass that glitter like distant galaxies under light.
- Variation: Use white mother-of-pearl beads and silver moon charms for a soft, luminous “moonlight” variation.
What You Need
- 6mm blue sandstone (goldstone) round beads
- Gold eye pins & 4mm jump rings
- Gold crescent moon, starburst, & crystal teardrop charms
- Moon-and-star decorative toggle clasp
- Round-nose & chain-nose pliers
4. Mermaid Tail & Iridescent Pearl Slider Bracelet
What This Idea Means
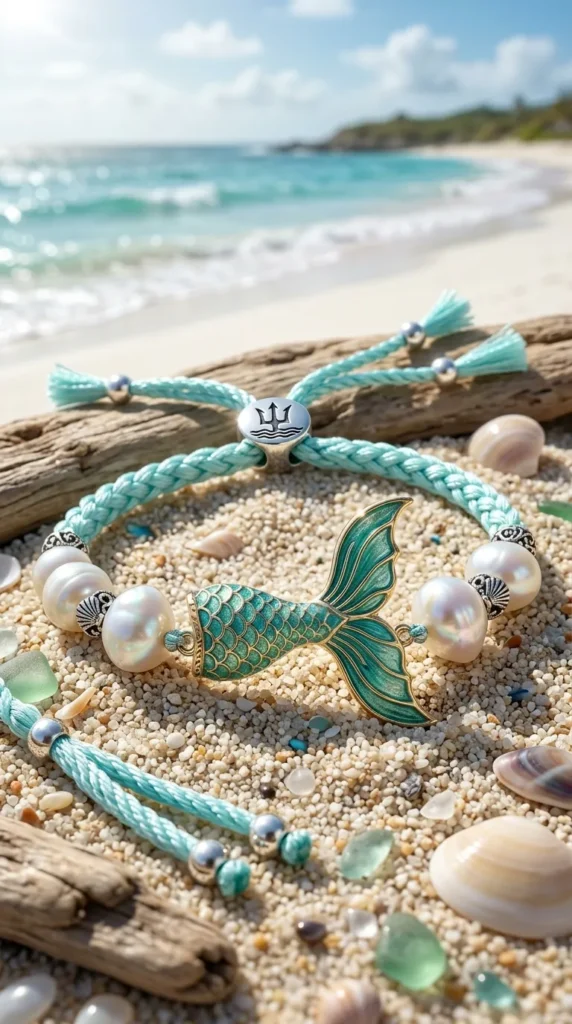
Evoking oceanic fantasy, this whimsical slider bracelet pairs luminous iridescent mother-of-pearl beads with an enamelled mermaid tail focal charm set on an adjustable pastel turquoise silk cord base.
How to Make It
- Prepare Cord Base: Cut a 14-inch piece of 1.5mm pastel turquoise braided silk or nylon cord.
- Mount Centerpiece: Slide a double-looped enamelled pastel pink and seafoam green mermaid tail connector charm into the exact center of the cord.
- String Pearl Accents: On either side of the mermaid tail, string three 6mm iridescent baroque pearls, securing them in place with small sliding knot stops or rubber-lined spacer beads.
- Create Slider Knot: Cross the two cord ends and tie a 5-wrap macramé sliding knot using a separate 6-inch cord piece.
- Dangle Ends: Thread small sea-glass beads onto the dangling cord tips, knotting them firmly and burning cord ends slightly to seal.
Tips & Variations
- Tip: Choose baroque or coin pearls with uneven surfaces to enhance the organic marine aesthetic.
- Variation: Swap the mermaid tail charm for a detailed sea turtle, seahorse, or seashell charm.
What You Need
- Enamelled mermaid tail connector charm
- 6mm iridescent baroque pearls
- 1.5mm pastel turquoise silk/nylon cord
- Rubber-lined gold spacer beads
- Scissors & lighter (for sealing knot ends)
5. Mushroom & Acorn Forest Floor Bead Bracelet
What This Idea Means
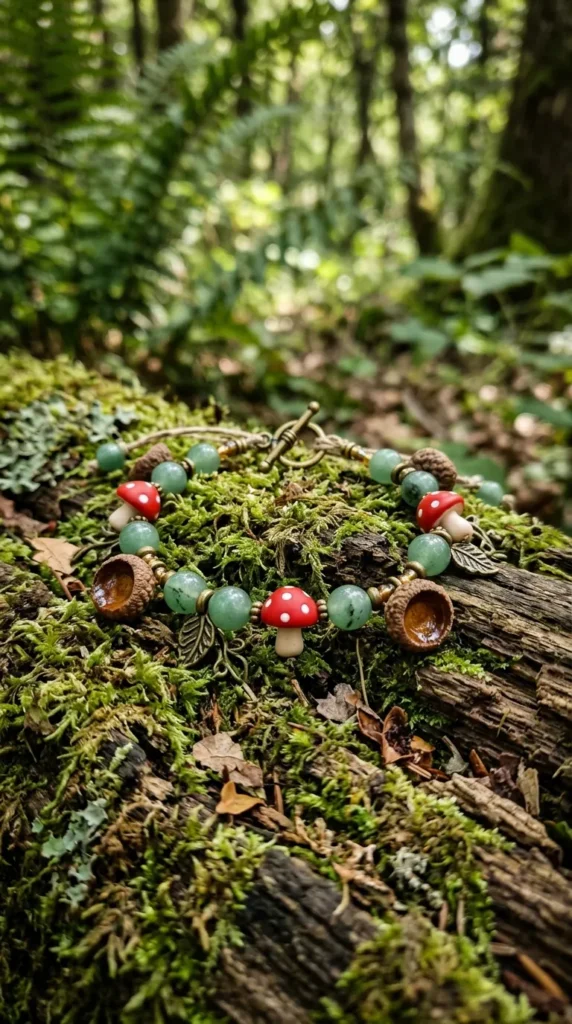
This charming woodland design features hand-sculpted mini polymer clay spotted mushrooms, real tiny oak acorn caps filled with resin, and natural green aventurine gemstone beads strung on an earthy cord.
How to Make It
- Sculpt Clay Mushrooms: Sculpt tiny 8mm red-and-white spotted toadstools using polymer clay. Pierce vertical center holes with a needle and bake at 275°F (135°C) for 30 minutes.
- Prep Acorn Charms: Clean tiny natural acorn caps. Fill caps with clear epoxy resin tinted with brown ink, insert a eye pin, and let cure into mini faux acorns.
- Assemble Strand: Thread 0.7mm clear stretch cord with alternating 6mm green aventurine round beads, clay mushrooms, and wood beads.
- Dangle Acorns: Attach 2 or 3 of your handmade acorn charms to jump rings placed between the beads.
- Secure Strand: Tie a firm surgeon’s knot in the stretch cord, seal with clear jewelry cement, and hide the knot inside a wood bead hole.
Tips & Variations
- Tip: Apply a glossy clear coat over the polymer clay mushroom caps after baking to give them a fresh dew-dropped sheen.
- Variation: Use dark brown wood beads and tiger’s eye stones for a deeper, autumnal cottagecore color palette.
What You Need
- Polymer clay (Red, White) & toothpicks
- Real mini acorn caps & clear epoxy resin
- 6mm green aventurine & wooden round beads
- Eye pins, jump rings, & 0.7mm stretch cord
- Jewelry cement & wire cutters
6. Pastel Ribbon & Woven Glass Seed Bead Corsage Bracelet
What This Idea Means
Drawing inspiration from romantic Victorian wrist corsages, this piece weaves intricate pastel glass seed beads into a wide cuff pattern mounted on a soft organza or silk ribbon that ties into a plush bow.
How to Make It
- Weave Seed Bead Panel: Using loom or off-loom multi-strand square stitch, weave a 1-inch wide by 4-inch long band of glass seed beads in a soft pastel floral pattern (rose pink, soft cream, sage).
- Attach End Tubes: Slide multi-strand ribbon end clamps onto both short ends of the woven bead panel and crimp tight with pliers.
- Prepare Ribbon: Cut a 24-inch length of 1.5-inch wide blush pink organza or silk ribbon.
- Mount Panel to Ribbon: Sew or securely rivet the crimped end clamps of the bead panel onto the center of the organza ribbon.
- Wear: Tie the long ribbon ends around your wrist into a romantic, flowing bow.
Tips & Variations
- Tip: Use anti-fray liquid sealant along the cut ends of organza ribbon to keep edges crisp and unravel-free.
- Variation: Incorporate tiny crystal rhinestones into the bead weave pattern for added subtle evening sparkle.
What You Need
- Size 11/0 glass seed beads (Blush pink, Cream, Sage)
- Beading loom or fireline thread with needles
- Ribbon end clamps (1 inch wide)
- 1.5-inch wide blush pink organza ribbon
- Anti-fray sealant & crimping pliers


7. Vintage Storybook Lock & Key Charm Stack
What This Idea Means
Evoking secret gardens and classic fantasy novels, this multi-layered stack pairs detailed antique brass skeleton keys, vintage lockets, and unstrung glass pearl strands to form a dreamy, storybook-inspired wrist accessory.
How to Make It
- Prepare Individual Strands: Create three separate elastic or chain bracelets designed to be worn together as one stack.
- Strand One (Pearls): String 6mm cream glass pearls on stretch cord, centering a small antique brass heart locket.
- Strand Two (Keys): Link antique brass cable chain, attaching 3 tiny ornate key charms along its length using jump rings.
- Strand Three (Beads): String Faceted amber glass crystal beads on stretch cord, interspaced with filigree bead caps.
- Unify the Stack: Join all three strands at the back using a single wide multi-strand magnetic clasp to keep the stack organized on the wrist.
Tips & Variations
- Tip: Put small secret pictures or romantic quotes inside the locket to give the bracelet genuine storybook sentiment.
- Variation: Use silver hardware and icy clear crystal beads for a “Snow Queen” winter fairytale vibe.
What You Need
- 6mm cream glass pearls & amber crystal beads
- Antique brass skeleton key charms & heart locket
- Antique brass cable chain & filigree bead caps
- Multi-strand magnetic clasp & stretch cord
- Pliers & jewelry glue
8. Woodland Birch Bark & Copper Wire Wrap Bracelet
What This Idea Means
Organic, rustic, and whimsical, this cuff utilizes sealed strips of natural birch tree bark bound with intricate copper wire coils, embedded gemstone chips, and leaf stampings.
How to Make It
- Prepare Birch Bark: Cut a 1-inch by 6-inch strip of flexible fallen birch bark. Clean gently, sand rough edges, and seal with matte acrylic varnish.
- Backing Reinforcement: Glue a flexible thin copper strip onto the inner side of the bark to give the cuff shape memory.
- Wire-Wrap Edges: Wrap 22-gauge raw copper wire around the length of the cuff, weaving through punched holes along the edges.
- Add Gemstone Details: Coil fine 26-gauge wire around small green nephrite jade or moss agate chip beads, securing them in clusters on the outer bark surface.
- Shape Cuff: Gently bend the reinforced bark strip around a bracelet mandrel or glass jar into a curved, open-cuff silhouette.
Tips & Variations
- Tip: Only use fallen bark collected from ground debris to ensure your crafting remains eco-friendly and non-damaging to living trees.
- Variation: Stencil tiny gold stars onto the bark surface before wire wrapping for a woodland-astronomy crossover.
What You Need
- Sealed natural birch bark strip
- Thin copper sheet strip (backing)
- 22-gauge & 26-gauge solid copper wire
- Moss agate or green jade gemstone chips
- Matte acrylic varnish & leather hole punch
9. Iridescent Bubble & Teacup Polymer Clay Bracelet
What This Idea Means
A playful Alice-in-Wonderland tea party theme! Hand-sculpted mini polymer clay teacups and teapots are paired with iridescent clear glass “bubble” beads, creating a whimsical, floaty bracelet full of eccentric charm.
How to Make It
- Sculpt Tea Set Charms: Sculpt 10mm pastel polymer clay teacups, saucers, and a mini teapot. Insert eye pins into top edges before baking at 275°F (135°C) for 30 minutes.
- Paint Details: Paint fine floral patterns onto the baked clay teacups using micro acrylic paint pens. Seal with high-gloss glaze.
- Assemble Bubble Strand: String alternating 8mm clear iridescent glass beads (bubble beads) and pastel glass pearls onto a gold cable chain.
- Hang Tea Charms: Attach your miniature teacups and teapot charms between the bubble beads using 5mm gold jump rings.
- Attach Clasp: Fasten a decorative heart-shaped toggle clasp onto the chain ends.
Tips & Variations
- Tip: Apply two coats of high-gloss polyurethane varnish over glass-like bubble beads and clay charms to enhance the shiny porcelain effect.
- Variation: Add small plastic or resin slice charms (like mini lemon slices or cake slices) to expand the tea party motif.
What You Need
- Polymer clay (Pastel shades) & eye pins
- Micro acrylic paint pens & high-gloss glaze
- 8mm clear iridescent glass “bubble” beads
- Gold cable chain, jump rings, & toggle clasp
- Wire cutters & pliers
10. Floating Dragonfly & Pressed Fern Glass Bar Bracelet
What This Idea Means
This sleek yet whimsical bracelet features a horizontal clear glass tube pendant filled with real tiny pressed fern fronds, floating between delicate silver chains adorned with detailed filigree dragonfly charms.
How to Make It
- Prepare Glass Bar: Take a hollow clear glass tube bead (approx. 1.5 inches long) open on both ends.
- Insert Pressed Fern: Slide a tiny pressed fern frond and gold foil flecks inside the glass tube using fine tweezers.
- Seal Tube Ends: Glue silver bead end caps onto both open ends of the glass tube using clear two-part epoxy, sealing the fern inside.
- Connect Side Chains: Connect 2.5-inch pieces of fine sterling silver curb chain to both side loops of the glass tube bar.
- Attach Dragonfly Charms: Hang small double-sided filigree dragonfly charms from jump rings alongside the chain. Attach a lobster claw clasp.
Tips & Variations
- Tip: Check that the epoxy seal on the glass tube ends is 100% airtight to preserve the green vibrancy of the pressed fern leaf.
- Variation: Use tiny pressed colorful flower petals (like yellow buttercups or red poppies) instead of ferns.
What You Need
- Hollow clear glass tube beads & silver end caps
- Micro pressed fern fronds & gold foil flakes
- Clear two-part epoxy adhesive
- Sterling silver curb chain & dragonfly charms
- Jump rings & lobster clasp
11. Crystal Droplet & Woven Vine Macramé Bracelet
What This Idea Means
Combining fiber arts with fantasy jewelry, this bracelet uses dark forest green waxed polyester cord woven in intricate leaf macramé knots, cradling faceted clear teardrop quartz crystals that look like morning dew drops on a forest vine.
How to Make It
- Prep Cord Base: Cut four 30-inch strands of 0.8mm dark green waxed polyester cord (Linhasita cord).
- Knot Leaf Pattern: Tie diagonal double half-hitch knots to build a repeating vine-and-leaf knot pattern across the center arc.
- Insert Crystal Droplets: At the tip of each woven cord leaf, thread a faceted clear teardrop crystal bead, anchoring it securely into the surrounding knots.
- Build Length: Continue knotting until the vine reaches 6 inches in length.
- Finish Sliding Closure: End with a sliding square-knot macramé closure, capping loose cord tails with small wooden or quartz beads.
Tips & Variations
- Tip: Use a foam macramé board and T-pins to pin your knots down while working to ensure leaf patterns remain neat and symmetrical.
- Variation: Use autumn-colored cord (rust orange or golden yellow) with amber crystal droplets for a fall foliage design.
What You Need
- 0.8mm dark forest green waxed polyester cord
- Faceted clear quartz teardrop beads
- Macramé pin board & T-pins
- Sharp scissors & handheld lighter (for cord fusing)
12. Celestial Sunburst & Opalite Crystal Elastic Bangle
What This Idea Means
Opalite glass boasts a milky blue translucent glow that shifts to warm orange under light. Paired with polished gold sunburst medallions and tiny stardust beads, this easy stretch bangle exudes ethereal solar magic.
How to Make It
- Prepare Elastic: Cut an 8-inch piece of heavy-duty 0.8mm clear stretch elastic cord.
- String Opalite Beads: Thread 6mm smooth round opalite beads onto the cord, alternating with 2mm smooth gold spacer beads.
- Insert Sunburst Center: Place a double-looped gold sunburst medallion charm directly in the middle of the strand.
- Complete the Ring: Continue stringing opalite beads until the total strand length matches your wrist measurement.
- Knot and Seal: Tie a tight surgeon’s knot, douse with clear jewelry cement, and pull the knot inside the central hole of a gold spacer bead.
Tips & Variations
- Tip: Opalite shows off its milky internal glow best when worn directly against skin or over dark clothing backgrounds.
- Variation: Pair opalite with silver moon charms instead of gold sunbursts for a cool-toned lunar theme.
What You Need
- 6mm smooth round opalite beads
- 2mm gold spacer beads & gold sunburst medallion
- 0.8mm clear stretch elastic cord
- G-S Hypo Cement or jewelry glue
- Scissors & ruler
13. Whimsical Carousel Horse & Pastel Bead Bracelet
What This Idea Means
Bringing vintage carnival nostalgia to life, this delightful bracelet features a detailed pastel-enamelled carousel horse charm centered among swirled peppermint-style glass beads, pastel pearls, and star spacers.
How to Make It
- Prepare Wire Bar: Thread a double-sided enamel carousel horse connector charm onto a central jump ring.
- String Pastel Beads: Thread 0.7mm stretch cord with alternating 6mm pastel pink, lavender, and mint glass beads, interspaced with gold star spacer beads.
- Incorporate Centerpiece: Attach the carousel horse charm to the center arc of the elastic bead strand.
- Add Accents: Add two dangling tiny jingle bells or crystal drop charms next to the horse for interactive sound and movement.
- Secure Strand: Knot the stretch cord securely, apply glue, and trim excess cord tails.
Tips & Variations
- Tip: Select high-detail enamel charms with gold outlining to maintain a refined, high-end vintage aesthetic.
- Variation: Swap the carousel horse for a circus tent, Ferris wheel, or balloon charm to expand the carnival theme.
What You Need
- Enamel pastel carousel horse charm
- 6mm pastel glass beads (Pink, Mint, Lavender)
- Gold star spacer beads & mini jingle bells
- 0.7mm clear stretch cord
- Jewelry glue & scissors


14. Ethereal Feather & Raw Amethyst Copper Cuff
What This Idea Means
Balancing soft organic elements with sturdy metalworking, this open cuff bracelet features hand-hammered copper wire formed into curving feather plumes that cradle a raw purple amethyst cluster at the center.
How to Make It
- Form Cuff Framework: Cut a 7-inch length of heavy 10-gauge copper wire. Shape it into an open oval cuff using a bracelet mandrel.
- Hammer Texture: Flatten the wire ends on a steel bench block using a chasing hammer to create feather-like texture lines.
- Mount Amethyst Center: Wire-wrap a small raw purple amethyst stone cluster onto the top center of the copper cuff using 22-gauge copper wire.
- Weave Feather Lines: Wrap 28-gauge fine copper wire around the flattened ends to mimic intricate feather barb lines.
- Patina Finish: Dip the finished cuff in a liver of sulfur solution to darken crevices, then buff high edges with fine steel wool for vintage contrast.
Tips & Variations
- Tip: Sand the open tips of the copper wire cuff until completely smooth before wearing so they don’t scratch your wrist.
- Variation: Use silver-plated wire and raw fluorite or aquamarine stones for an icy frost-feather look.
What You Need
- 10-gauge, 22-gauge, & 28-gauge solid copper wire
- Small raw purple amethyst crystal cluster
- Steel bench block & chasing hammer
- Liver of sulfur & fine steel wool
- Bracelet mandrel & wire cutters
15. Pixie-Dust Vial & Shimmering Crystal Charm Bracelet
What This Idea Means
Straight out of a fairy tale, this whimsical charm bracelet features a tiny glass vial filled with glowing “pixie dust” (luminescent phosphorescent powder), paired with shimmering crystal drop charms on a bright silver link chain.
How to Make It
- Fill Dust Vial: Take a tiny 15mm glass cork vial. Fill it with glow-in-the-dark phosphorescent powder mixed with fine iridescent glitter.
- Seal Cork: Apply clear epoxy glue to the cork stopper, press it firmly into the vial, and screw a small eye hook into the top of the cork.
- Prepare Crystal Drops: Attach wire-wrapped teardrop glass crystal charms to jump rings.
- Assemble Bracelet Chain: Cut a 7-inch bright silver cable chain.
- Attach Charms: Attach the pixie-dust vial directly to the middle link of the chain. Flank it on both sides with your crystal teardrop charms spaced 1 inch apart. Fasten a lobster clasp.
Tips & Variations
- Tip: Expose the glow-in-the-dark powder to UV sunlight or a blacklight flashlight for 10 seconds to make the vial glow intensely in dark environments.
- Variation: Fill the tiny vial with tiny colorful glass seed beads or mini written wish scrolls instead of glowing powder.
What You Need
- Mini glass cork vial (15mm) with top eye hook
- Glow-in-the-dark phosphorescent powder & fine glitter
- Clear epoxy glue & clear crystal teardrop charms
- Bright silver cable chain, jump rings, & lobster clasp
- Pliers set
16. Vintage Pocket Watch Movement & Steampunk Wing Bracelet
What This Idea Means
Merging Victorian elegance with whimsical fantasy technology, this steampunk design mounts an upcycled mechanical watch movement fitted with delicate brass angel or dragonfly wings onto a wide leather strap.
How to Make It
- Prepare Watch Base: Extract a non-working mechanical watch gear movement from an antique pocket watch.
- Attach Wing Charms: Glue detailed brass filigree wing charms behind the watch movement using clear two-part epoxy glue.
- Mount on Leather: Cut a 1.5-inch wide by 7-inch long soft brown leather wrist strap.
- Attach Centerpiece: Rivet or epoxy the winged watch movement onto the center of the leather strap.
- Install Hardware: Install double snap buttons or a buckle closure onto the ends of the leather strap.
Tips & Variations
- Tip: Clean old watch movements with rubbing alcohol beforehand to remove old oil residue so adhesive bonds strongly.
- Variation: Add small red or blue glass rhinestones into the open gear holes of the watch movement for bright pops of jewel tone color.
What You Need
- Vintage mechanical watch gear movement
- Stamped brass filigree wing charms
- Soft brown leather wrist strap (1.5 inches wide)
- Two-part clear epoxy glue & leather snap buttons
- Snap setting tool & hammer
17. Delicate Wildflower Resin Pebble & Braided Silk Bracelet
What This Idea Means
Featuring real tiny pressed botanicals embedded inside pebble-shaped clear resin cabochons, this delicate bracelet joins resin floral links together with soft, hand-braided silk embroidery cord.
How to Make It
- Cast Resin Pebbles: Place tiny dried pressed wildflowers (such as baby’s breath or mini yellow buttercups) inside pebble-shaped silicone cabochon molds fitted with side wire loops.
- Pour Resin: Fill molds with clear UV resin and cure under a UV lamp for 3 minutes until glass-smooth. Demold your resin pebble links.
- Braid Silk Cords: Cut six 12-inch lengths of pale pastel silk embroidery floss. Braid two separate 2.5-inch cord straps.
- Connect Components: Connect one braided silk strap to each side wire loop of the central resin wildflower pebble using silver jump rings.
- Attach Adjustable Clasp: Finish cord ends with silver ribbon crimps and attach a sliding extension chain clasp.
Tips & Variations
- Tip: Place dried flowers face down in the mold so the front of the resin pebble presents the clearest view of the petals.
- Variation: Use tiny green clover leaves instead of flowers for a lucky “four-leaf clover” botanical theme.
What You Need
- Pebble-shaped silicone cabochon molds (with loop channels)
- Clear UV resin & UV curing lamp
- Micro pressed dried wildflowers
- Pastel silk embroidery floss & silver jump rings
- Ribbon crimps & extension clasp
18. Rainbow Opal & Cloud Charm Pastel Stretch Stack
What This Idea Means
Dreamy and ethereal, this colorful pastel bracelet pairs iridescent natural opal or aura glass beads with hand-sculpted white polymer clay cloud charms and a tiny dangling rainbow pendant.
How to Make It
- Sculpt Cloud Charms: Sculpt small 12mm puffy white clouds using white polymer clay. Insert headpins into top edges and bake at 275°F (135°C) for 30 minutes.
- String Rainbow Spectrum: Thread 0.7mm stretch cord with 4mm translucent glass beads arranged in a soft pastel rainbow gradient (Pastel Red -> Orange -> Yellow -> Green -> Blue -> Violet).
- Insert Cloud & Rainbow Pendants: String your handmade cloud charm and a pre-made enamelled rainbow pendant into the middle of the strand.
- Complete Ring: Continue stringing beads until reaching wrist measurement.
- Tie Knot: Fasten a tight double surgeon’s knot, douse with jewelry adhesive, and hide the knot inside a wide bead hole.
Tips & Variations
- Tip: Use translucent pastel beads rather than opaque beads so natural light shines through the rainbow gradient.
- Variation: Replace the rainbow pendant with a golden sun charm for a “sunshine through clouds” theme.
What You Need
- White polymer clay & headpins
- 4mm translucent pastel beads (Rainbow gradient shades)
- Enamelled mini rainbow pendant
- 0.7mm clear stretch elastic cord
- Jewelry glue & scissors
19. Enchanted Willow Bark & Amber Resin Bead Strand
What This Idea Means
Evoking ancient woodland magic, this earthy bracelet combines faceted cognac amber resin beads, carved wooden beads, and tiny brass willow leaf charms on an organic cord base.
How to Make It
- Prep Cord: Cut a 9-inch length of 1mm brown waxed cotton cord. Attach a bead stopper on one end.
- Pattern Assembly: Thread 8mm warm cognac amber resin beads alternating with dark carved wooden beads.
- Insert Leaf Charms: Thread small stamped brass willow leaf charms between every third bead along the front arc.
- Add Central Focal Stone: Place a large raw amber chunk or polished carnelian stone in the exact center of the strand.
- Finish Cord Closure: Complete stringing, tie a sliding macramé knot closure, and add small wooden accent beads onto cord tails.
Tips & Variations
- Tip: Amber resin beads are lightweight and warm quickly against the skin, making them extremely comfortable for all-day wear.
- Variation: Use silver leaf charms and dark ebony wood beads for a cool, moody moonlight forest aesthetic.
What You Need
- 8mm cognac amber resin beads & 1 raw amber chunk
- Carved wooden round beads & brass willow leaf charms
- 1mm brown waxed cotton cord
- Bead stopper, scissors, & lighter
20. Gothic Poison Bottle & Velvet Ribbon Wrist Tie
What This Idea Means
For lovers of dark fantasy and whimsical gothic aesthetic, this dramatic wrist tie features a miniature dark glass “poison bottle” charm suspended from a wide, plush midnight-black velvet ribbon band.
How to Make It
- Prepare Poison Bottle: Take a 15mm dark cobalt blue or black mini glass bottle charm featuring a cork stopper and top loop.
- Label the Bottle: Use a micro paint pen to draw a tiny skull-and-crossbones or write “POISON” on a tiny aged paper label glued to the bottle face.
- Cut Velvet Ribbon: Cut a 20-inch length of 1-inch wide deep black velvet ribbon.
- Mount Center Bail: Slide a wide antique silver decorative bail ring onto the middle of the velvet ribbon band.
- Attach Bottle Charm: Hang your labeled poison bottle charm from the center bail ring using a heavy-duty jump ring. Tie long ribbon ends around your wrist into a dramatic knot or bow.
Tips & Variations
- Tip: Singe the raw edges of velvet ribbon lightly with a flame to prevent fraying over time.
- Variation: Swap the poison bottle charm for a tiny potion bottle filled with deep red liquid resin.
What You Need
- 15mm dark cobalt blue mini glass bottle charm with cork
- Aged paper scrap & micro black gel pen
- 1-inch wide midnight black velvet ribbon
- Decorative wide slider bail ring & heavy jump ring
- Clear craft glue & lighter


