The crochet balaclava has officially claimed its throne as the ultimate winter accessory, bridging the gap between high-fashion runway utility and cozy, handmade charm. Across Pinterest boards and street-style lookbooks, this versatile head-and-neck warmer has become a staple for crafters and fashion lovers alike. Whether you are looking to elevate your cold-weather wardrobe or searching for your next satisfying weekend project, creating your own crochet balaclava allows for endless personalization.
Dive into these 20 amazing crochet balaclava ideas, complete with step-by-step breakdowns, material lists, pro tips, and style variations to inspire your hook and yarn collection!
1. The Classic Ribbed Minimalist Balaclava
Brief Introduction
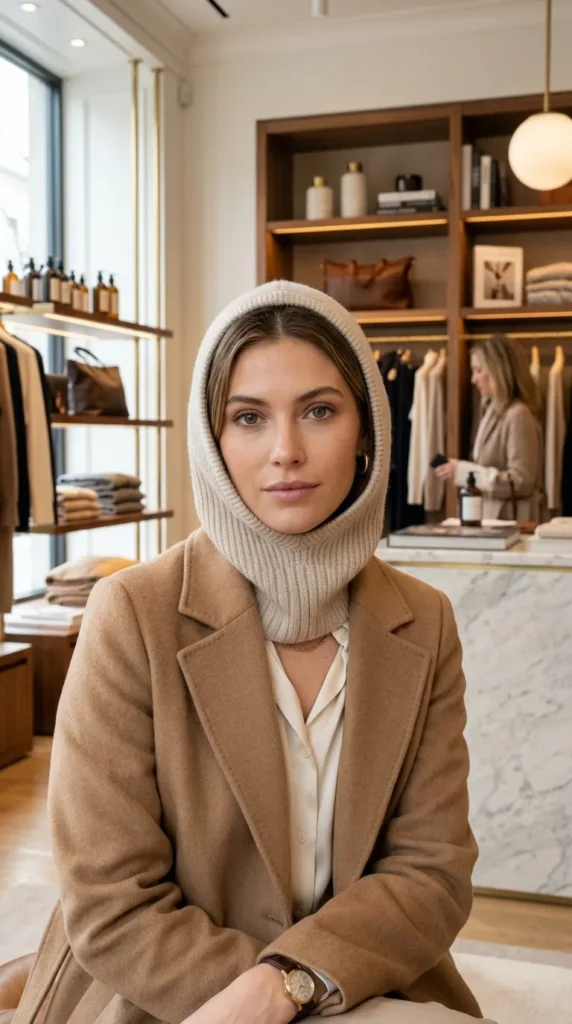
Simplicity is the ultimate sophistication. The Classic Ribbed Minimalist Balaclava is designed for those who prefer clean lines, understated elegance, and a timeless silhouette that pairs effortlessly with any winter coat.
What This Idea Means
This design focuses on texture over flashy patterns, utilizing alternating post stitches to create a stretchy, tightly fitted ribbed fabric that hugs the head and neck comfortably without feeling restrictive.
What is Needed to Make That Thing
- Yarn: 3 to 4 skeins of worsted-weight wool or a soft wool-acrylic blend (approx. 400–500 yards).
- Hook Size: 5.0 mm (H) crochet hook.
- Notions: Tapestry needle for weaving ends, stitch markers, and measuring tape.
How to Make It
- The Neck Collar: Start by working in rows of ribbing (using back loop only half double crochets or front/back post double crochets) to form a snug collar that fits comfortably over your head.
- The Hood Foundation: Once the collar band reaches the desired circumference, join the ends and begin working upwards in rounds or rows to form the lower face opening.
- Shaping the Crown: Divide your stitches to work flat back and forth for the back of the hood, leaving the face opening free. Increase or decrease slightly to contour the crown of the head.
- Seaming: Sew the top seam of the hood together using a mattress stitch for a seamless finish.
- Finishing Touches: Add a single crochet border around the face opening for a polished, professional edge.
Tips and Variations
- Tip: Choose a superwash wool blend to ensure your minimalist balaclava is machine washable and holds its shape over time.
- Variation: Knit-look crochet stitches, such as the waistcoast stitch (knit stitch), give this classic design an authentic knitted appearance.
2. The Granny Square Mosaic Balaclava
Brief Introduction
Infuse vibrant retro energy into your winter wardrobe with a balaclava constructed from classic or modern geometric granny squares stitched together.
What This Idea Means
This style repurposes the beloved crochet granny square motif into a functional, sculptural garment. It is a fantastic stash-buster project that allows you to play with high-contrast color palettes.
What is Needed to Make That Thing
- Yarn: Assorted DK or worsted-weight yarn scraps in 4 to 6 complementary colors.
- Hook Size: 4.5 mm (7) crochet hook.
- Notions: Tapestry needle, scissors, and blocking pins.
How to Make It
- Crochet the Squares: Create a set of small, uniform granny squares (typically 4-round squares). You will need roughly 10 to 14 squares depending on your head size.
- Layout and Arrangement: Lay your squares out in a pattern that maps out the side panels, crown, and neck guard of the balaclava.
- Joining: Join the squares using a flat braid join, whip stitch, or join-as-you-go method to create a cohesive fabric structure.
- Assembly: Fold and seam the joined panel layout to form the hood and neck covering, ensuring the face opening remains unobstructed.
- Border Trim: Work two rounds of single crochet around the face and bottom edges to lock the structure in place.
Tips and Variations
- Tip: Block your individual granny squares before joining them to ensure clean, crisp seams and an even fit.
- Variation: Use solid-colored squares with a contrasting joining yarn for a modern, stained-glass visual effect.
3. The Pastel Dream Floral Appliqué Balaclava
Brief Introduction
Delicate, whimsical, and utterly charming, this balaclava features sweet handmade floral appliqués scattered across a dreamy pastel background.
What This Idea Means
It brings a touch of spring into the chilliest winter days. The soft yarn base provides warmth, while 3D crocheted daisies or roses add an artisanal, boutique-quality touch.
What is Needed to Make That Thing
- Yarn: Soft pastel chunky or bulky yarn (e.g., pale lavender, mint, or butter yellow) for the base, plus scrap amounts of white and yellow for flowers.
- Hook Size: 6.0 mm (J) crochet hook.
- Notions: Sewing needle and matching thread to attach appliqués securely.
How to Make It
- Base Hood Construction: Crochet a simple, seamless hoodie base using half double crochet stitches in your chosen pastel shade.
- Crafting the Flowers: Crochet 6 to 10 small 3D daisies (yellow centers surrounded by white petals).
- Arranging Appliqués: Pin the flowers along the side panels and around the crown of the dry-laid balaclava to find an aesthetically pleasing composition.
- Attaching: Securely sew each flower onto the balaclava using durable sewing thread or yarn tails.
- Collar Extension: Finish the bottom with a ribbed collar for extra insulation.
Tips and Variations
- Tip: Securely weave in flower yarn tails on the wrong side of the work so the interior stays smooth against your skin.
- Variation: Swap out daisies for embroidered French knot flowers directly onto the fabric if you prefer a flatter texture.
4. The Hooded Scarf (Scarf-Hood Combo) Balaclava
Brief Introduction
The ultimate multi-functional accessory, the Hooded Scarf Balaclava extends into long, draped neck tails that can be wrapped around your neck like a luxurious scarf.
What This Idea Means
Eliminating the need for a separate scarf, this piece provides continuous warmth from your head down to your chest, featuring long panels that hang down stylishly in the front.
What is Needed to Make That Thing
- Yarn: 5 to 6 skeins of bulky wool-blend yarn.
- Hook Size: 6.5 mm (K) crochet hook.
- Notions: Tapestry needle and tape measure.
How to Make It
- The Back Panel & Hood: Start at the back crown, working outward and downward to shape a spacious hood.
- Extending the Scarves: Once the hood meets the front opening, extend the bottom front stitches on both sides into long, continuous scarf panels.
- Length Adjustment: Continue working rows until the scarf tails reach your desired length (typically down to mid-chest).
- Edging: Add a clean slip stitch border around the entire perimeter to prevent curling.
Tips and Variations
- Tip: Add deep pockets to the ends of the scarf tails for extra coziness and practicality.
- Variation: Finish the ends of the scarf panels with thick, handmade fringe tassels for a boho-chic aesthetic.
5. The Chunky Mohair Halo Balaclava
Brief Introduction
Lush, cloud-like, and ethereal, the Chunky Mohair Halo Balaclava wraps you in a soft haze of luxury while keeping the biting wind completely at bay.
What This Idea Means
By holding a strand of fluffy mohair yarn together with a supportive wool or alpaca base yarn, you achieve an incredible halo effect that looks high-end and feels feather-light.
What is Needed to Make That Thing
- Yarn: 2 skeins of fingering-weight mohair-silk blend held double with 2 skeins of DK wool, or a single strand of fluffy brushed alpaca yarn.
- Hook Size: 7.0 mm crochet hook (to create an open, drapey fabric).
- Notions: Tapestry needle.
How to Make It
- Double-Strand Setup: Wind your mohair and support yarn together into working cakes.
- Foundation Chain: Chain enough stitches to comfortably frame your face, then join in the round.
- Working in the Round: Use loose treble or double crochet stitches to maintain a soft drape.
- Crown Shaping: Decrease evenly across the top back rows to round out the back of the head.
- Final Press: Lightly steam-block the finished piece to fluff up the mohair fibers.
Tips and Variations
- Tip: Mohair can be tricky to frog (rip out); take your time with your stitch counts on the first round.
- Variation: Opt for a vibrant jewel tone like emerald green or rich plum to make the mohair texture pop.
6. The Cat Ear Kawaii Balaclava
Brief Introduction
Playful, cute, and viral across social media, the Cat Ear Balaclava features subtle, perky feline ears built right into the top corners of the hood.
What This Idea Means
It brings a fun, youthful personality to winter fashion. The cat ears form naturally through clever shaping or can be sewed on post-assembly for a sharp, defined shape.
What is Needed to Make That Thing
- Yarn: 3 skeins of super bulky chenille or acrylic yarn (in pink, black, or white).
- Hook Size: 8.0 mm (L-11) crochet hook.
- Notions: Stitch markers and tapestry needle.
How to Make It
- Body of the Hood: Crochet the main balaclava tube using half double crochets in the round up to the top of the head.
- Seaming the Top: Seam the top straight across to close the crown. When you seam across a flat top edge, the corners naturally push up into triangular points.
- Ear Definition: Pinch the top corners diagonally and sew a straight stitch across the base of each corner to accentuate the cat ear shape.
- Face Trim: Add a contrasting color trim around the face opening for a framed look.
Tips and Variations
- Tip: Chenille yarn creates a velvety, plush texture that makes the cat ears look extra soft and rounded.
- Variation: Add tiny embroidered whiskers or little pink inner-ear details using scrap yarn.
7. The Vintage Lace Stitch Balaclava
Brief Introduction
Reminiscent of heirloom textiles, the Vintage Lace Balaclava showcases intricate openwork stitches that offer a breathable, delicate aesthetic for transitional weather.
What This Idea Means
Rather than heavy insulation, this design prioritizes high-fashion texture, using airy lacework patterns like the V-stitch or shell stitch to create a stunning vintage look.
What is Needed to Make That Thing
- Yarn: 2 skeins of fine sport-weight mercerized cotton or bamboo yarn.
- Hook Size: 3.5 mm (E-4) crochet hook.
- Notions: Blocking mat and pins.
How to Make It
- Lace Pattern Swatch: Practice your chosen lace repeat (e.g., shell and mesh stitch) to ensure consistent tension.
- Collar Base: Work a solid 2-inch band of single crochet around the neck before transitioning into the lace pattern.
- Hood Panel: Expand stitches to start the lace pattern for the hood, working flat in rows and leaving the face opening clear.
- Crown Shaping: Decrease lace clusters symmetrically at the back crown.
- Blocking: Wet block the finished piece aggressively to open up the delicate lace windows.
Tips and Variations
- Tip: Mercerized cotton gives lace stitches incredible stitch definition and a subtle sheen.
- Variation: Add miniature crochet ties with pearl beads at the chin for a secure, vintage bonnet closure.


8. The Ombre Sunset Gradient Balaclava
Brief Introduction
Capture the breathtaking hues of dusk with a smooth, shifting color gradient that flows seamlessly from deep magenta through warm orange to soft golden yellow.
What This Idea Means
This balaclava acts as a wearable canvas for color theory, utilizing yarn cake gradients or controlled color-pooling techniques to create a striking visual transition.
What is Needed to Make That Thing
- Yarn: One full gradient yarn cake (approx. 800 yards, fingering or DK weight) or 4 sequential skeins of fading tones.
- Hook Size: 4.0 mm (G) crochet hook.
- Notions: Tapestry needle.
How to Make It
- Start at the Crown: Begin at the top crown with your darkest color, working in tight spiral rounds of half double crochet.
- Gradual Expansion: Expand outward to form the upper head structure, allowing the color transition to naturally unfold.
- Face Opening Split: Divide work to frame the face, continuing your color rows downward.
- Neck Integration: Finish the lower neck section with the lightest color in the gradient sequence.
- Clean Ends: Weave in color transition tails securely along the interior wrong side.
Tips and Variations
- Tip: Wind your gradient cake carefully to ensure you start from the correct end of the color spectrum.
- Variation: Use a Tunisian crochet simple stitch to make the color gradient look even smoother and more blended.
9. The Teddy Bear Bouclé Fleece Balaclava
Brief Introduction
Wrap yourself in maximum coziness with a balaclava made from textured bouclé yarn that mimics the ultra-soft, snuggly feel of a classic teddy bear.
What This Idea Means
Bouclé yarn creates an instantly thick, fuzzy fabric that traps body heat exceptionally well while offering an adorable, tactile aesthetic that is trending heavily in winter accessories.
What is Needed to Make That Thing
- Yarn: 2 to 3 skeins of teddy bear brown or cream bouclé or loop yarn.
- Hook Size: 6.0 mm (J) crochet hook (larger hooks help navigate textured yarn).
- Notions: Stitch markers (since stitches can be hard to see in bouclé yarn).
How to Make It
- Tactile Stitching: Because bouclé hides individual stitches, rely on touch and stitch markers to count rows accurately.
- Foundation Ring: Chain a comfortable face opening circumference and join.
- Simple Construction: Work basic single or half double crochet rounds upward to the crown, keeping your tension relaxed.
- Top Closure: Whip stitch the top closed from the inside.
- Chin Strap Addition: Crochet a short strap with a button closure under the chin for a snug fit.
Tips and Variations
- Tip: Pair bouclé yarn with a smooth strand of regular yarn if you struggle to see your stitches.
- Variation: Attach small bear ears to the top for an absolute maximum cute factor.
10. The Edgy Punk Safety Pin & Chain Balaclava
Brief Introduction
For those who lean toward alternative fashion, this pitch-black balaclava features metallic chain embellishments and decorative safety pins for an edgy, streetwear-inspired look.
What This Idea Means
It subverts the cozy nature of crochet by adding industrial hardware elements, transforming a standard handmade garment into a statement piece of avant-garde fashion.
What is Needed to Make That Thing
- Yarn: 3 skeins of jet black worsted-weight acrylic yarn.
- Hook Size: 5.0 mm (H) crochet hook.
- Notions: Silver safety pins, lightweight aluminum jewelry chain, and jewelry pliers.
How to Make It
- Solid Black Base: Crochet a classic, tightly-stitched minimalist balaclava using standard single crochet stitches for a dense, matte texture.
- Chain Accents: Weave aluminum chains loosely across the side panels or around the jawline, anchoring them with sturdy stitches.
- Safety Pin Arrangement: Attach clusters of varying-sized silver safety pins along the side or neck collar.
- Reinforcement: Ensure all hardware is securely fastened so it doesn’t snag your hair or clothing.
Tips and Variations
- Tip: Remove metal hardware before washing the garment to prevent rusting or fabric snagging.
- Variation: Use contrasting neon green or hot pink yarn for the face trim to amplify the punk aesthetic.
11. The Cottagecore Botanical Embroidered Balaclava
Brief Introduction
Transform a plain, neutral crochet balaclava into a pastoral work of art with surface embroidery depicting wild mushrooms, stems, and tiny garden leaves.
What This Idea Means
This style bridges the gap between crochet and embroidery, allowing you to “paint” with thread directly onto your finished crochet fabric to create a bespoke, nature-inspired masterpiece.
What is Needed to Make That Thing
- Yarn: 3 skeins of oat, cream, or oatmeal-colored wool yarn for the base.
- Embroidery Floss: Assorted colors (red, forest green, white, mustard).
- Hook & Needle: 5.0 mm crochet hook and a sharp tapestry needle.
How to Make It
- Neutral Base Creation: Crochet a clean, smooth balaclava using basic half double crochet stitches in a solid neutral shade.
- Sketching Placement: Lightly plan out where your botanical motifs will go (e.g., mushrooms climbing up the side panel).
- Surface Embroidery: Use the lazy daisy stitch for leaves, French knots for flower centers, and satin stitch for mushroom caps directly over the crochet stitches.
- Neck Banding: Finish with a neat ribbed collar.
Tips and Variations
- Tip: Do not pull your embroidery thread too tightly, or it will distort the underlying crochet stitches.
- Variation: Focus exclusively on a sprawling ivy vine wrapping around the face opening.
12. The Two-Tone Colorblock Modern Balaclava
Brief Introduction
Clean, graphic, and boldly modern, the Two-Tone Colorblock Balaclava splits down the middle or across the center with two striking contrasting colors.
What This Idea Means
Colorblocking creates a dramatic, high-impact visual split that highlights modern design sensibilities and allows you to wear two of your favorite colors simultaneously.
What is Needed to Make That Thing
- Yarn: 2 skeins each of two contrasting yarn colors (e.g., cobalt blue and bright orange, or black and crisp white).
- Hook Size: 5.5 mm (I) crochet hook.
- Notions: Tapestry needle and bobbins for color-changing.
How to Make It
- The Split Design: Decide whether you want a vertical split (left side vs. right side) or a horizontal split (upper head vs. lower collar).
- Colorwork Technique: Carry your unused yarn cleanly across rows or use the intarsia method for crisp color junctions.
- Hood Assembly: Work the sides evenly to maintain symmetrical color proportions.
- Border Contrast: Use the alternate color for the face opening trim to tie the two halves together.
Tips and Variations
- Tip: When changing colors mid-row, twist your yarns on the wrong side to prevent gaps or holes from forming.
- Variation: Add a third accent color for a narrow racing stripe running down the center crown.
13. The Statement Fringe Boho Balaclava
Brief Introduction
Flowing fringe details give this balaclava a dramatic, bohemian flair that moves with you and turns heads wherever you go.
What This Idea Means
Drawing inspiration from 1970s festival fashion and western wear, this design incorporates cascading strands of fringe along the neck cape and chin edges.
What is Needed to Make That Thing
- Yarn: 4 skeins of heavy worsted yarn in earthy tones (taupe, rust, or olive).
- Hook Size: 6.0 mm (J) crochet hook.
- Notions: Scissors and a fringe template (cardboard piece).
How to Make It
- Base Construction: Crochet a standard hood with an extended cape-like collar that flares over the shoulders.
- Preparing Fringe: Cut hundreds of equal-length yarn strands (approx. 6–8 inches long) using your cardboard template.
- Lark’s Head Knots: Attach groups of 2 to 3 strands along the bottom edge of the cape and down the front opening using a crochet hook to create rich fringe.
- Trim and Equalize: Trim the fringe neatly with sharp scissors so it hangs in a straight, even line.
Tips and Variations
- Tip: Comb through the fringe with a wire pet slicker brush if you want a brushed-out, feathered bohemian texture.
- Variation: Use multicolored yarn strands for the fringe to create a playful rainbow effect against a solid base.
14. The Luxe Cashmere-Blend Ribbed Balaclava
Brief Introduction
Unmatched in softness and warmth, the Luxe Cashmere-Blend Balaclava feels like a gentle hug for your face, offering pure, understated luxury.
What This Idea Means
By investing in a premium cashmere-blend yarn, you elevate a simple handmade craft project into an heirloom-quality designer accessory.
What is Needed to Make That Thing
- Yarn: 3 skeins of DK-weight cashmere-merino blend yarn.
- Hook Size: 4.5 mm (7) crochet hook.
- Notions: Tapestry needle.
How to Make It
- Tension Check: Cashmere blends bloom slightly when washed, so make a gauge swatch first to ensure optimal drape.
- Ribbed Foundation: Work entirely in micro-ribbing (slip stitch in back loop only or half double crochet in third loop) for maximum elasticity and elegance.
- Seamless Shaping: Carefully shape the crown with invisible decreases to maintain the refined texture.
- Gentle Blocking: Hand wash your finished balaclava in lukewarm water with wool wash, then lay flat to dry to bring out the luxurious cashmere softness.
Tips and Variations
- Tip: Always store cashmere accessories folded in breathable cotton bags rather than hanging them up to prevent stretching.
- Variation: Add a single, discreet mother-of-pearl button at the neck closure for an extra touch of refinement.


15. The Fair Isle Nordic Winter Balaclava
Brief Introduction
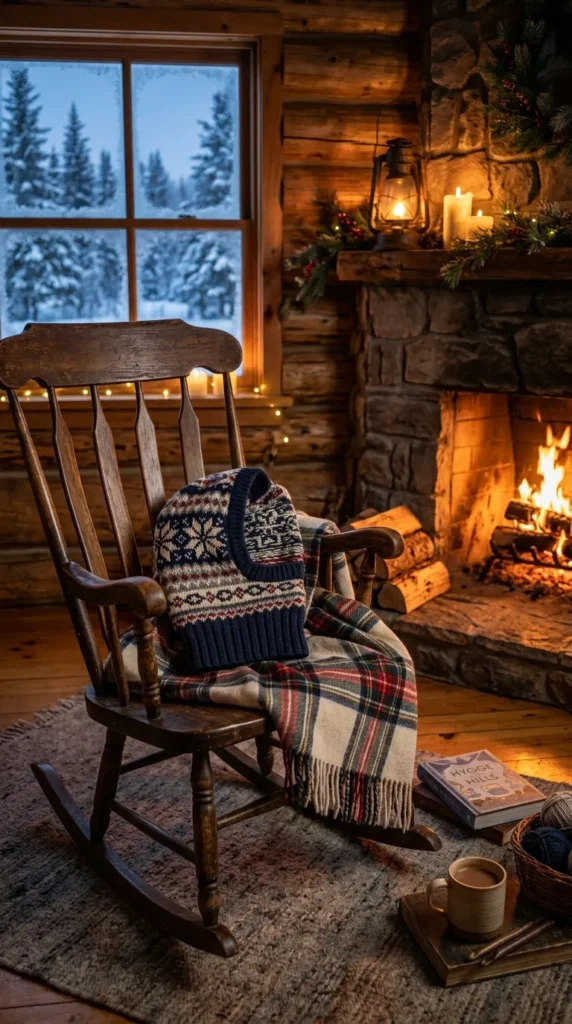
Embrace cozy cabin vibes with traditional Scandinavian geometric snowflake and pine tree motifs worked directly into your crochet fabric.
What This Idea Means
Using tapestry crochet techniques, you carry multiple colors across your rows to create intricate, timeless winter motifs that look like traditional knitted heritage wear.
What is Needed to Make That Thing
- Yarn: 2 skeins of cream yarn and 2 skeins of deep forest green or navy yarn.
- Hook Size: 4.5 mm (7) crochet hook.
- Notions: Tapestry needle.
How to Make It
- Chart Reading: Select a simple 8-row Nordic snowflake or star chart pattern.
- Tapestry Crochet: Work single crochet stitches, carrying the unused yarn color inside your stitches so it remains hidden until needed for color changes.
- Hood Construction: Follow your chart across the side panels while maintaining a comfortable crown curve.
- Solid Ribbing: Frame the face and neck with solid color ribbing to make the intricate colorwork pop.
Tips and Variations
- Tip: Keep your carried yarn loose enough that the fabric doesn’t pucker or bunch up.
- Variation: Use a faux-fur pom-pom attached to the top crown for a playful winter resort look.
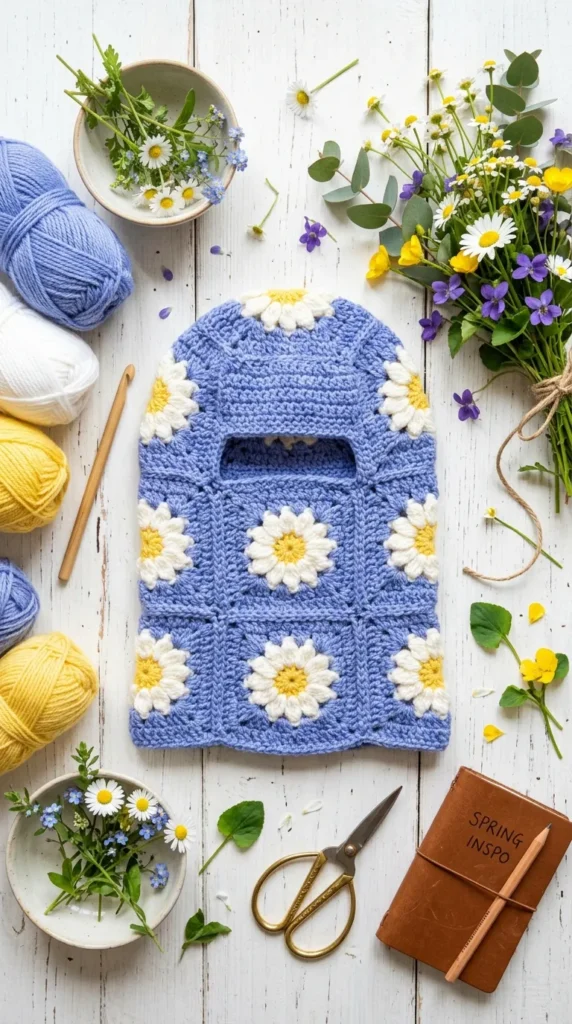
16. The Periwinkle Daisy Granny Square Balaclava
Brief Introduction
Fresh, cheerful, and delicate, this design features blooming crochet daisy motifs embedded in periwinkle blue granny squares for an enchanting floral frame.
What This Idea Means
It combines the charm of motif-based crochet with a gorgeous, calming periwinkle color scheme that flatters every skin tone.
What is Needed to Make That Thing
- Yarn: Periwinkle blue, bright white, and sunshine yellow DK yarn.
- Hook Size: 4.0 mm (G) crochet hook.
- Notions: Tapestry needle.
How to Make It
- Daisy Centers: Start each square with a small yellow puff stitch center, surrounded by white petals, before squaring it off with periwinkle blue rounds.
- Square Assembly: Create 12 identical floral squares and arrange them to form the head and neck structure.
- Seaming: Whipstitch squares together with matching periwinkle yarn.
- Border: Add a scalloped shell stitch border around the face opening for a feminine finish.
Tips and Variations
- Tip: Ensure all your yarn ends are securely woven in before joining squares to keep the interior clean.
- Variation: Use lavender or sage green as your background square color instead of periwinkle.
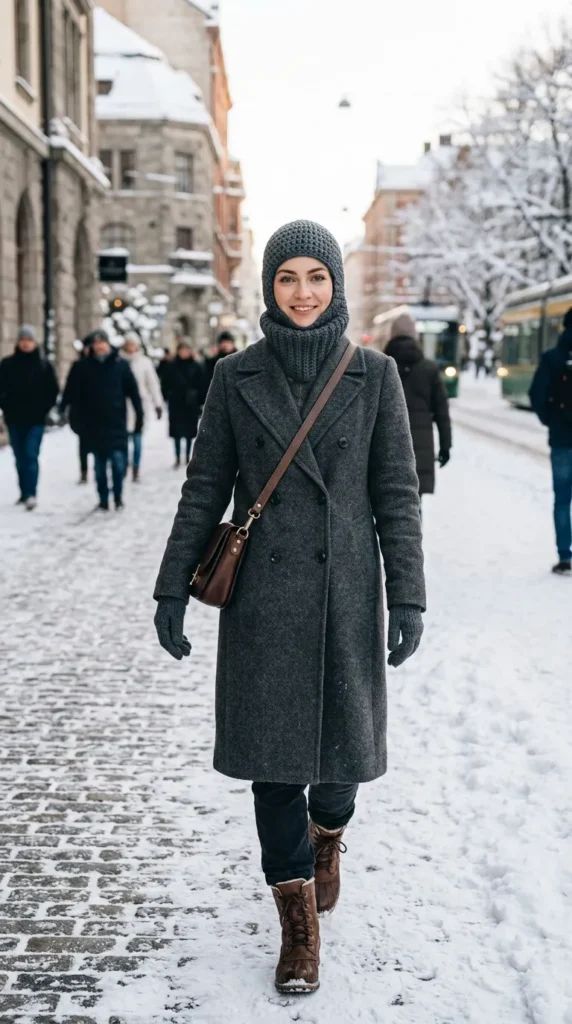
17. The Sleek Balaclava with a Turtleneck Collar
Brief Introduction
Engineered for ultimate cold-weather protection, this balaclava extends downward into a high, structured turtleneck that tucks seamlessly under your jacket.
What This Idea Means
It eliminates any drafty gaps around the collarbone and neck, offering maximum thermal efficiency while maintaining a streamlined, modern silhouette.
What is Needed to Make That Thing
- Yarn: 4 skeins of tightly spun wool yarn.
- Hook Size: 5.0 mm (H) crochet hook.
- Notions: Measuring tape and stitch markers.
How to Make It
- Extended Neck Base: Start from the bottom of the turtleneck, working upwards in tall, elastic ribbed rows for at least 6 to 8 inches.
- Transition to Hood: Once the collar reaches chin height, increase stitches symmetrically to begin the face opening and hood structure.
- Deep Hood Body: Work higher up the back of the head to ensure the hood fits with room and doesn’t pull tight.
- Crown Closure: Close the top crown using a neat flat seam.
Tips and Variations
- Tip: Make the turtleneck collar extra long so it can be folded down like a traditional sweater collar.
- Variation: Incorporate elastic thread into the top neck rows to ensure it stays snug against the throat.
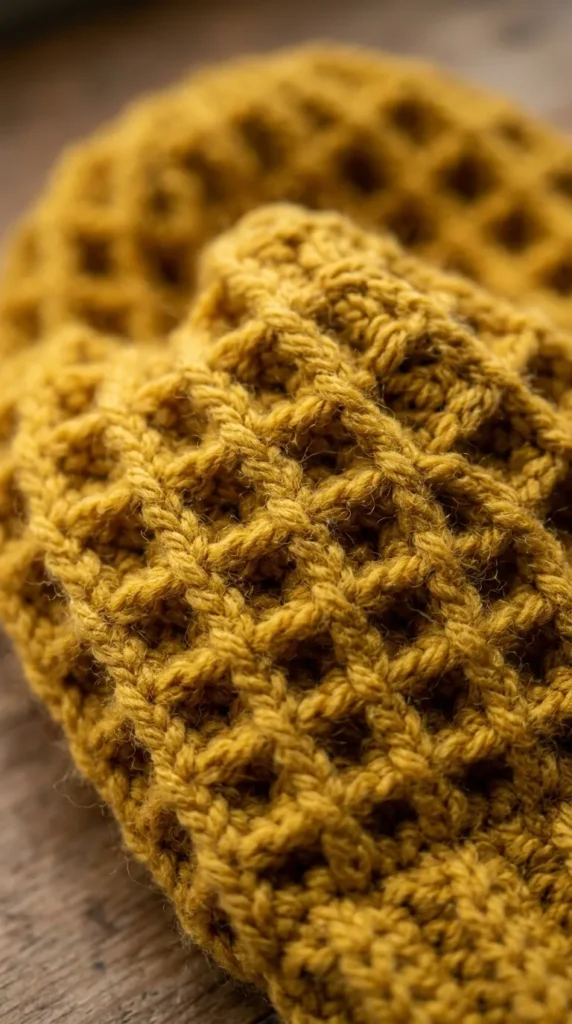
18. The Textured Waffle Stitch Cozy Balaclava
Brief Introduction
Boasting incredible squishiness and depth, the Waffle Stitch Balaclava creates a textured grid pattern that traps pockets of warm air.
What This Idea Means
The waffle stitch produces a thick, thermal fabric with a rich 3D texture that looks complex and professional while being surprisingly rhythmic to crochet.
What is Needed to Make That Thing
- Yarn: 4 skeins of worsted-weight wool or acrylic yarn.
- Hook Size: 5.5 mm (I) crochet hook.
- Notions: Tapestry needle.
How to Make It
- Foundation Multiple: Chain a multiple of 3 plus 2 stitches for your starting width.
- Waffle Pattern Setup: Alternate front post double crochets and regular double crochets to establish the grid foundation.
- Building the Hood: Continue working the waffle stitch pattern flat or in joined rows, wrapping it to form the hood shape.
- Crown Shaping: Decrease stitches gradually along the back to maintain the square grid structure as you shape the crown.
- Border: Finish the face opening with two rounds of simple half double crochet.
Tips and Variations
- Tip: Waffle stitch uses more yarn than basic stitches, so ensure you have an extra skein on hand.
- Variation: Use a self-striping yarn to watch the waffle texture shift through gorgeous color bands.
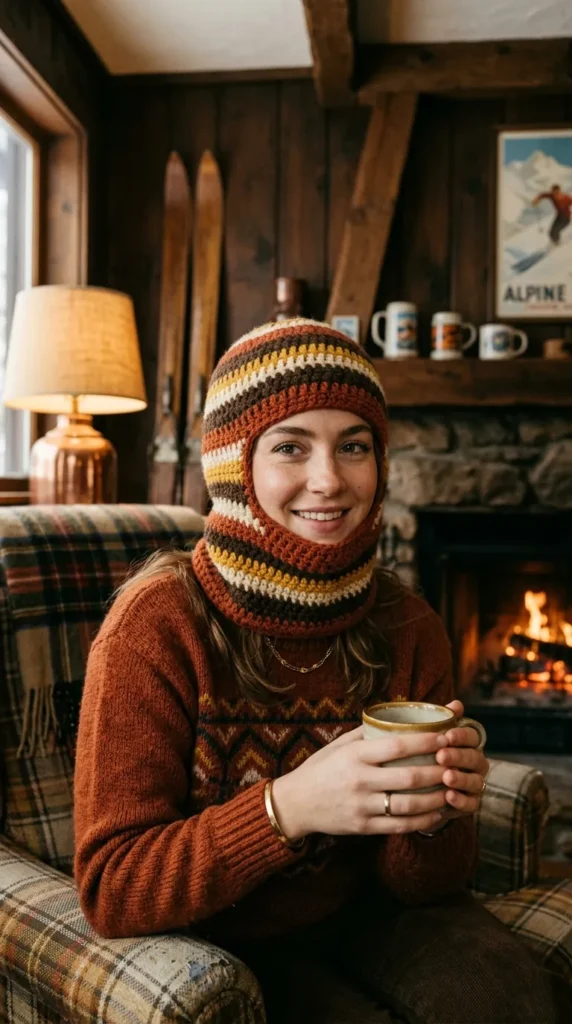
19. The Striped Retro 70s Vibe Balaclava
Brief Introduction
Channel vintage ski chalets and retro skate culture with bold, cheerful horizontal stripes in earthy 1970s color palettes.
What This Idea Means
This design celebrates playful color combinations—think mustard yellow, burnt orange, chocolate brown, and cream—arranged in rhythmic horizontal bands.
What is Needed to Make That Thing
- Yarn: Scraps or small skeins of 4 retro-palette worsted-weight yarns.
- Hook Size: 5.0 mm (H) crochet hook.
- Notions: Tapestry needle.
How to Make It
- Stripe Planning: Decide on a repeating stripe sequence (e.g., 3 rows of brown, 2 rows of cream, 3 rows of orange, 2 rows of mustard).
- Seamless Color Changes: Change colors cleanly on the final pull-through of the last stitch in each stripe.
- Hood Tube: Work in continuous rows or rounds up from the neck, maintaining your stripe pattern across all shaping.
- Face Framing: Finish the face opening with a solid-color ribbed border that matches your primary stripe color.
Tips and Variations
- Tip: Carry unused yarn loosely up the inside edge if your stripes are short, or cut and weave ends as you go for cleaner edges.
- Variation: Vary the thickness of your stripes (e.g., one wide block followed by multiple thin pinstripes) for dynamic visual rhythm.
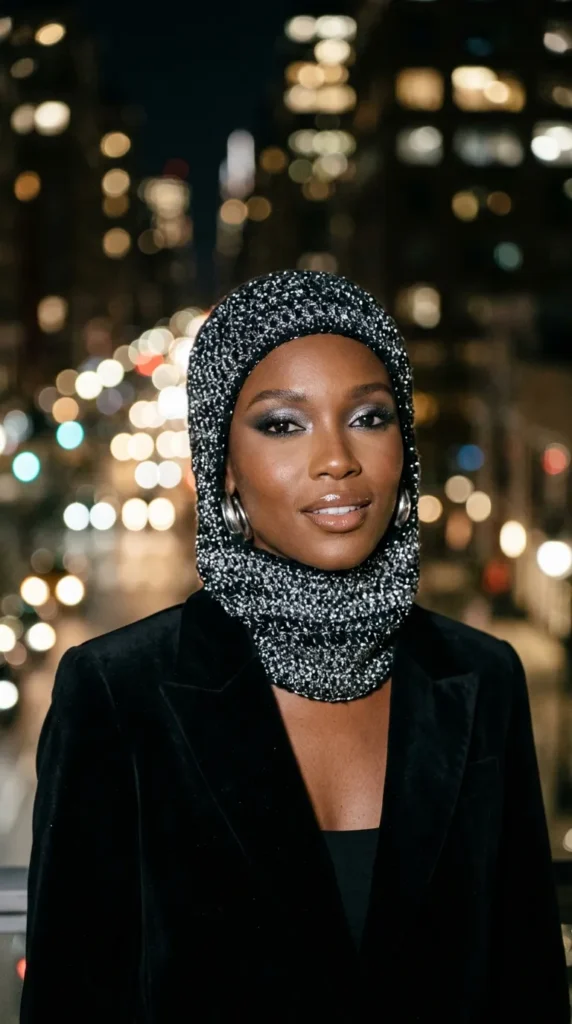
20. The Sparkly Metallic Lurex Evening Balaclava
Brief Introduction
Glamorous, dazzling, and ready for winter night-outs, this balaclava weaves a fine metallic thread through the yarn to catch every flicker of light.
What This Idea Means
It recontextualizes the cozy balaclava as an eveningwear accessory, perfect for winter galas, outdoor rooftop parties, or festive holiday markets.
What is Needed to Make That Thing
- Yarn: 2 skeins of fine black yarn held together with 1 spool of silver or gold lurex metallic thread.
- Hook Size: 4.5 mm (7) crochet hook.
- Notions: Tapestry needle.
How to Make It
- Holding Strands Together: Wind your base yarn and metallic lurex thread together to ensure an even, glittering distribution.
- Fine Stitch Pattern: Use a sleek half double crochet or waistcoat stitch to maximize the glittering surface area of the fabric.
- Structured Fit: Keep your tension firm so the fabric maintains a sleek, elegant drape around the head and face.
- Fastening: Add a delicate satin ribbon tie under the chin for an extra touch of evening elegance.
Tips and Variations
- Tip: Metallic thread can sometimes feel slightly scratchy; choose a soft, high-quality lurex blend to ensure comfort against the skin.
- Variation: Pair champagne-gold lurex with winter white yarn for a snow-queen aesthetic.
Conclusion
Crocheting your own balaclava is one of the most rewarding DIY projects you can tackle. Whether you choose the minimalist elegance of a ribbed classic, the whimsical charm of floral appliqués, or the retro flair of 70s stripes, each of these 20 ideas offers a unique way to express your personal style while staying cozy. Grab your favorite hook, pick your yarn palette, and start crafting your new favorite winter wardrobe staple today!


more ideas to come in future addition