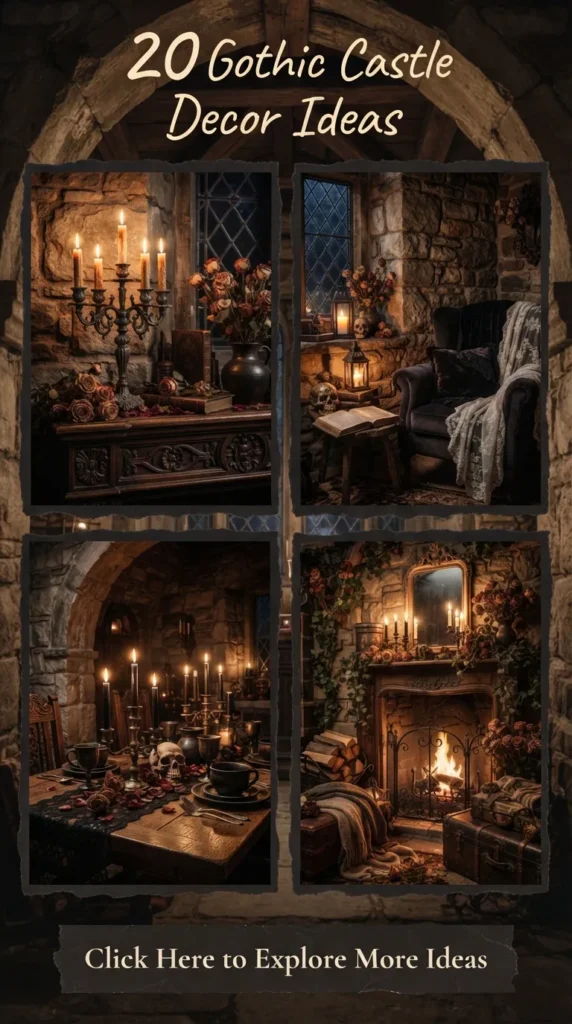
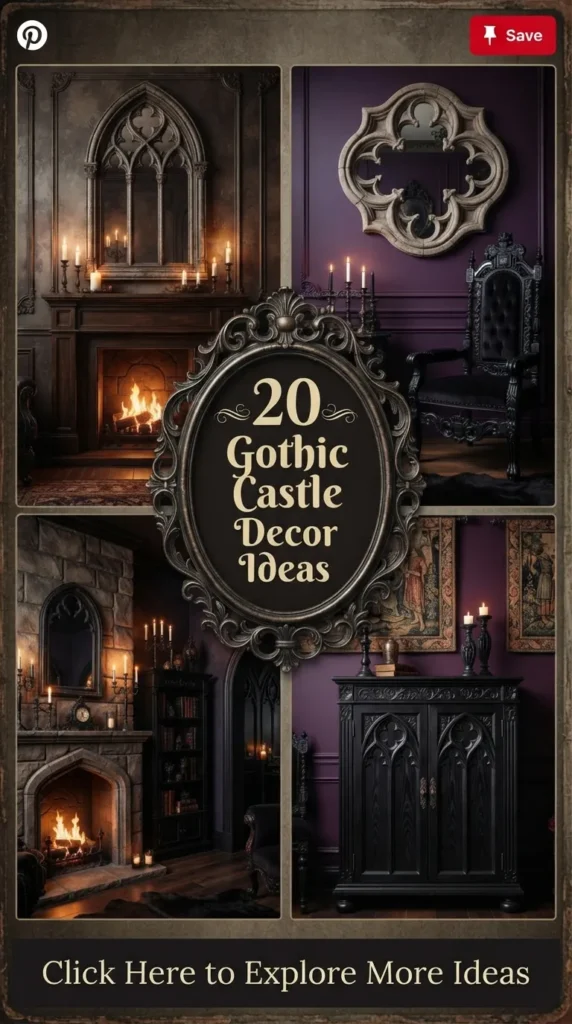
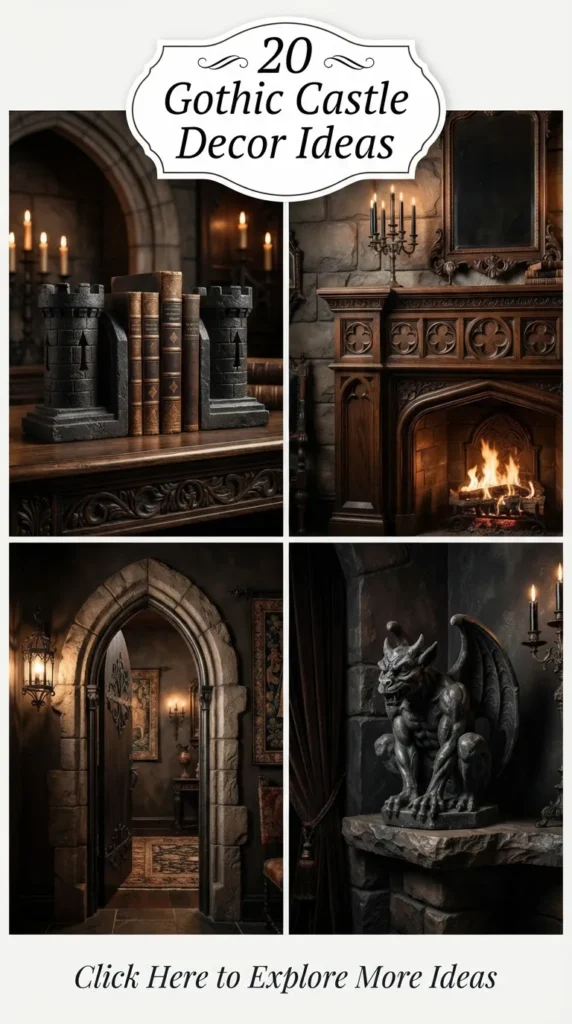
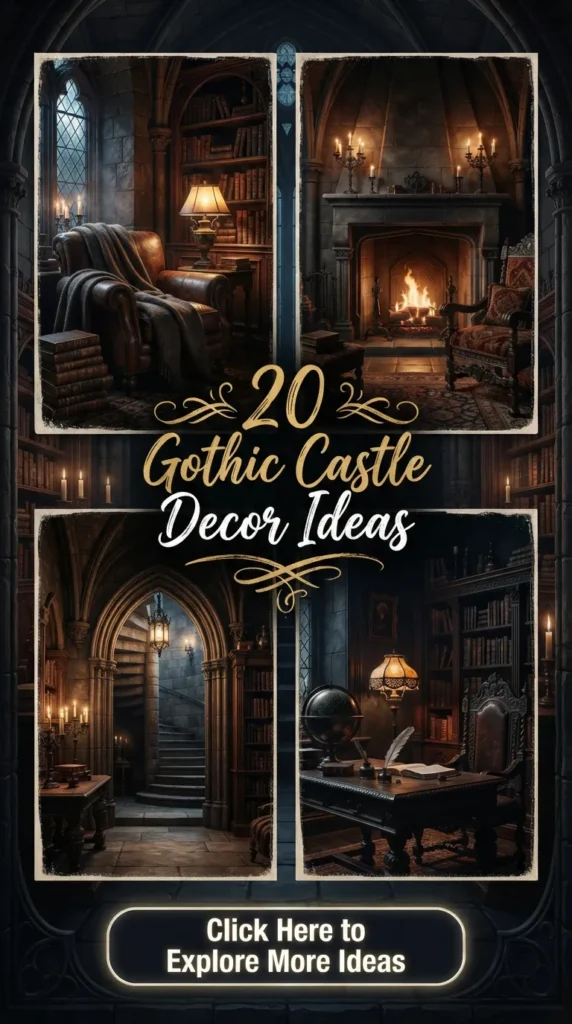
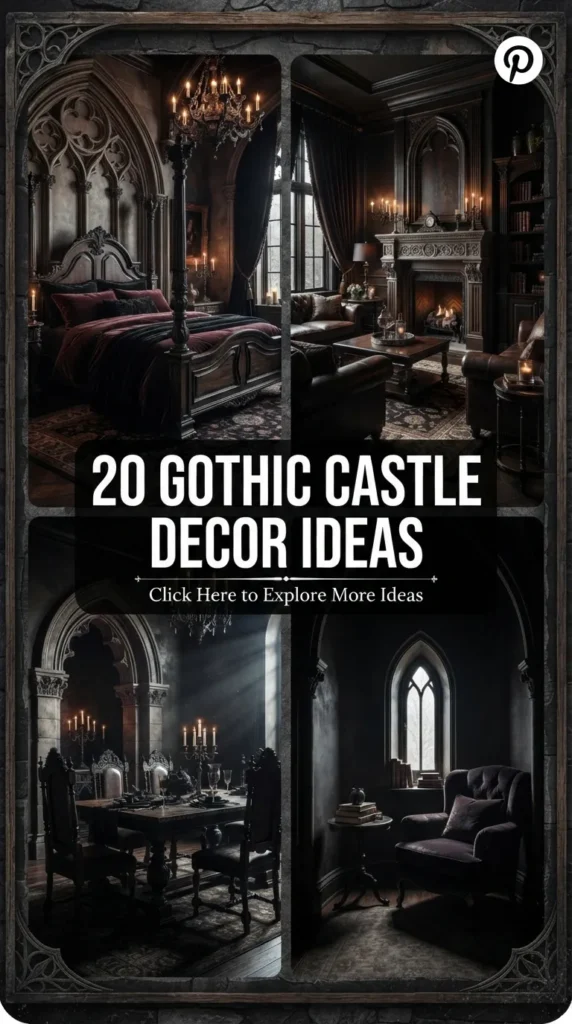
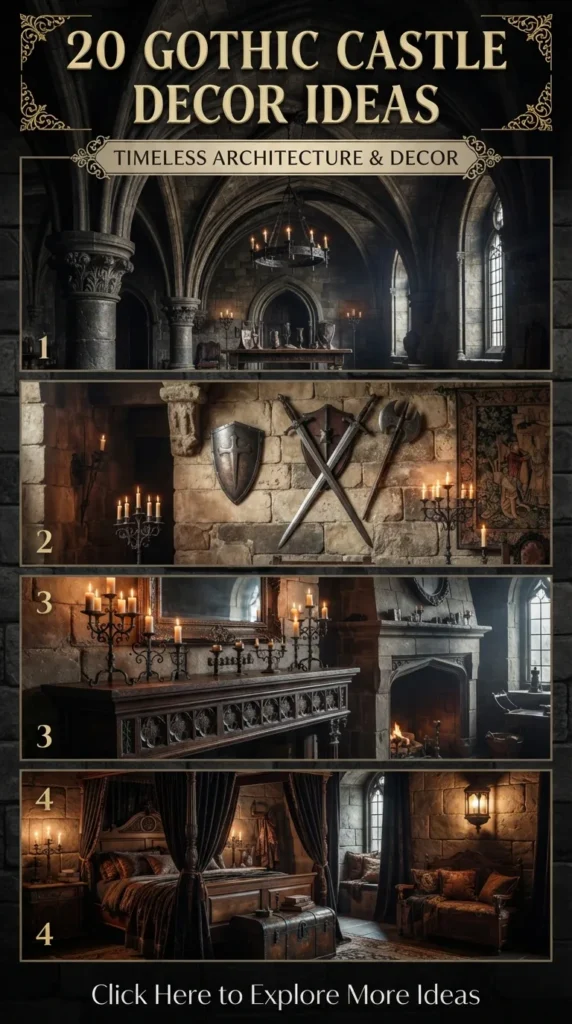
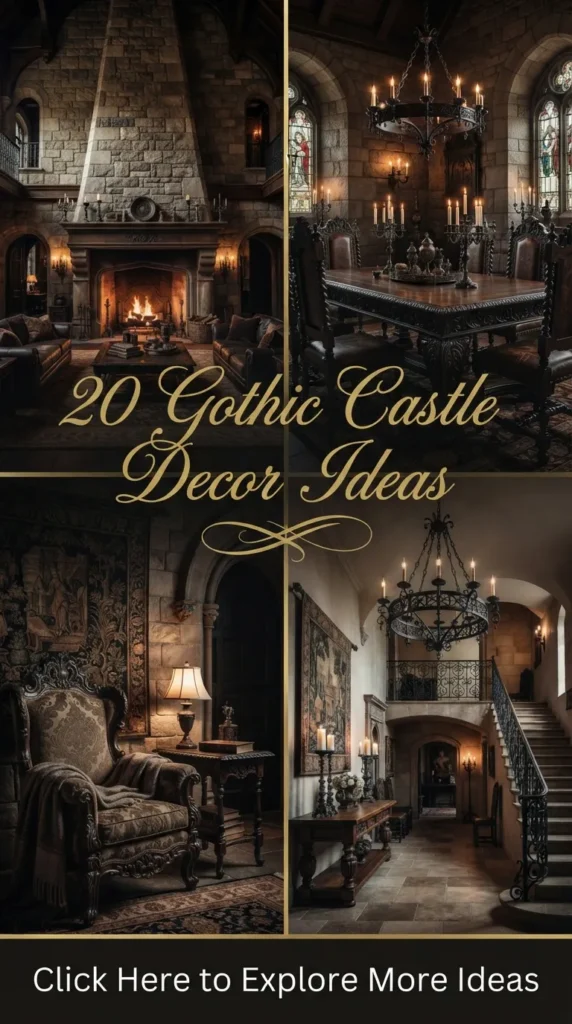
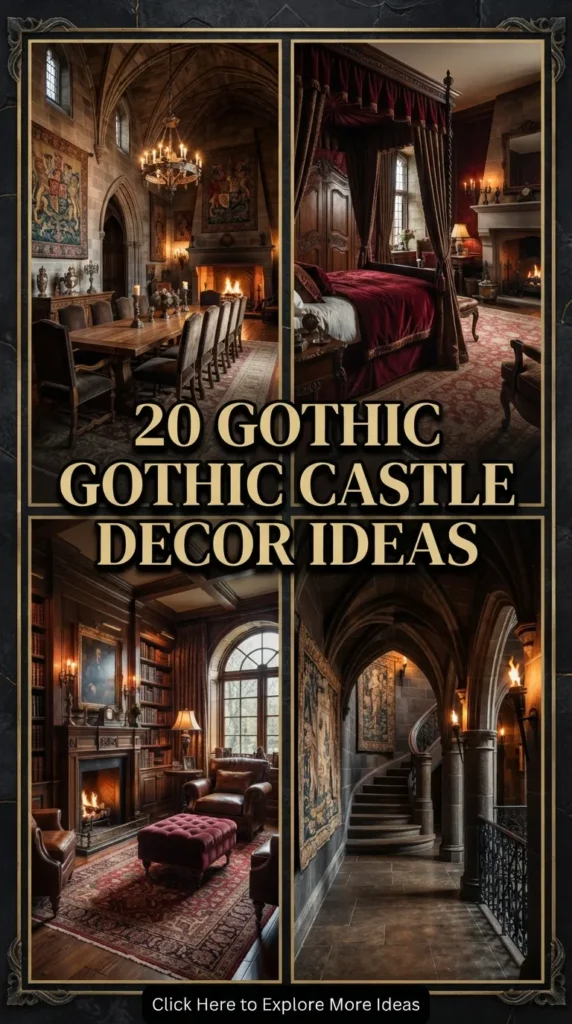
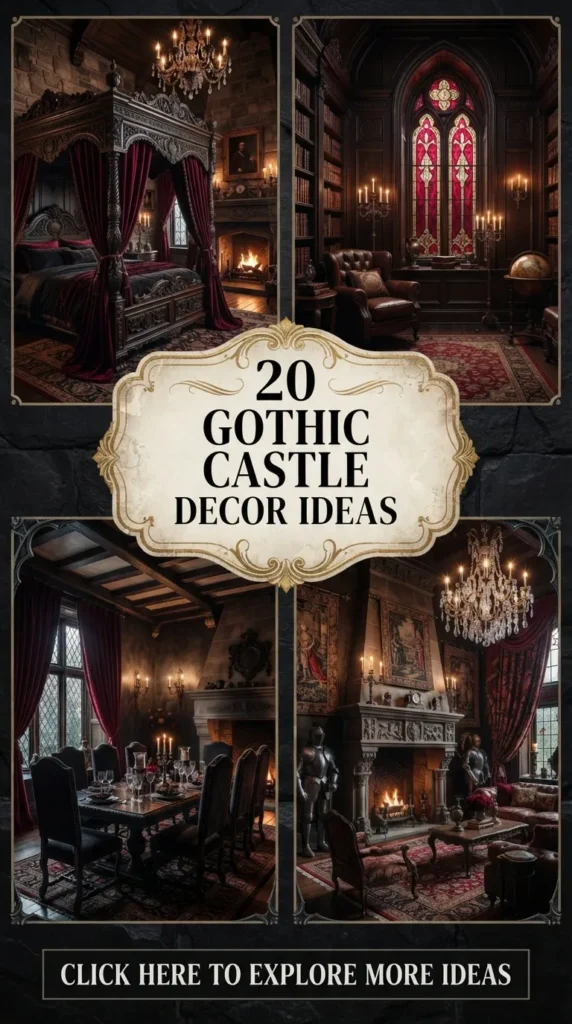
Gothic castle decor represents the pinnacle of dark drama, historic grandeur, and romantic architecture. Merging medieval structural elements—such as pointed lancet arches, ribbed vaulting, and carved tracery—with luxurious Victorian fabrics, flickering candlelight, and moody color palettes, this aesthetic converts ordinary modern living spaces into majestic castle sanctuaries.
Far from feeling cold or gloomy, modern aesthetic Gothic castle design celebrates rich tactile textures, craftsmanship, deep jewel tones, and timeless interior architecture. Whether you are aiming to transform a master bedroom into a moody royal chamber or introduce subtle medieval castle accents to your living area, this guide covers 20 unique, realistic, and Pinterest-worthy Gothic castle decor ideas.
Each idea explores its core design philosophy, step-by-step styling instructions, practical tips and variations, and a complete checklist of everything required to bring the vision to life.
1. Grand Cathedral Lancet Arch Wall Framing
Introduction
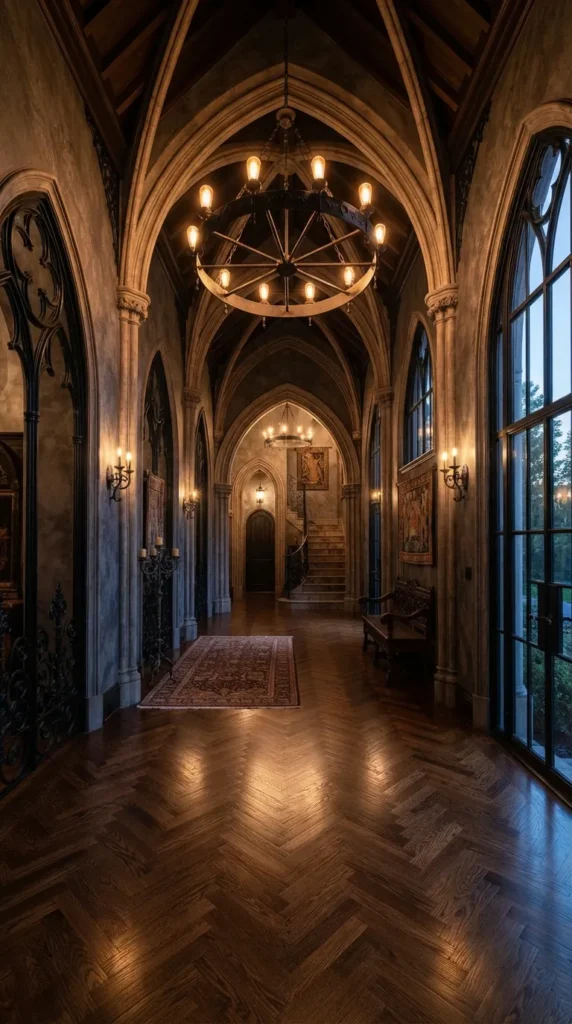
The lancet arch—a tall, narrow arch with a pointed peak—is the defining architectural signature of Gothic cathedrals and castles. Installing raised lancet arch framing directly onto interior walls creates immediate vertical height, structural drama, and historic grandeur.
What This Idea Means
This idea focuses on adding classical architectural architecture directly to flat drywall. By creating raised wooden or high-density polyurethane moulding in the shape of pointed lancet arches, you transform ordinary rooms into cathedral-inspired spaces. Painted in deep matte black or midnight charcoal, these panels frame furniture, mirrors, and artwork like majestic stone alcoves.
How to Make It
- Measure and Map: Measure wall dimensions carefully. Use painter’s tape to map out 3 to 5 tall, evenly spaced pointed lancet arch silhouettes across your focal wall.
- Cut Moulding: Cut vertical side stiles from flexible or pre-bent pine/MDF wall moulding strips using a miter saw.
- Form the Pointed Peak: Carefully miter the top joining pieces at a sharp 45-to-60-degree angle to create the pointed lancet peak at the top of each panel.
- Attach to Wall: Apply heavy-duty construction adhesive along the back of the trim, position along your tape guidelines, and secure using a brad nailer.
- Fill and Finish: Fill nail holes and seam joints with painter’s putty, sand smooth once dry, caulk outer edges, and paint the entire wall and moulding in a uniform dark matte finish (such as obsidian black or deep plum).
Tips and Variations
- Tip: Keep the width of the arches relatively narrow (18 to 24 inches wide) to emphasize vertical ceiling height and mimic authentic cathedral lancets.
- Variation: Inset vintage antiqued mirrors inside the lancet panels to reflect ambient candlelight and double the visual depth of the room.
What You Need to Make It
- Pine or High-Density MDF Wall Moulding Strips
- Miter Saw & Cordless Brad Nailer
- Heavy-Duty Construction Adhesive & Caulking
- Painter’s Putty & Fine Sandpaper
- Dark Interior Paint (e.g., Matte Obsidian Black or Midnight Charcoal)
2. Heavy Crimson Velvet Canopy Bed with Wrought Iron Posts
Introduction
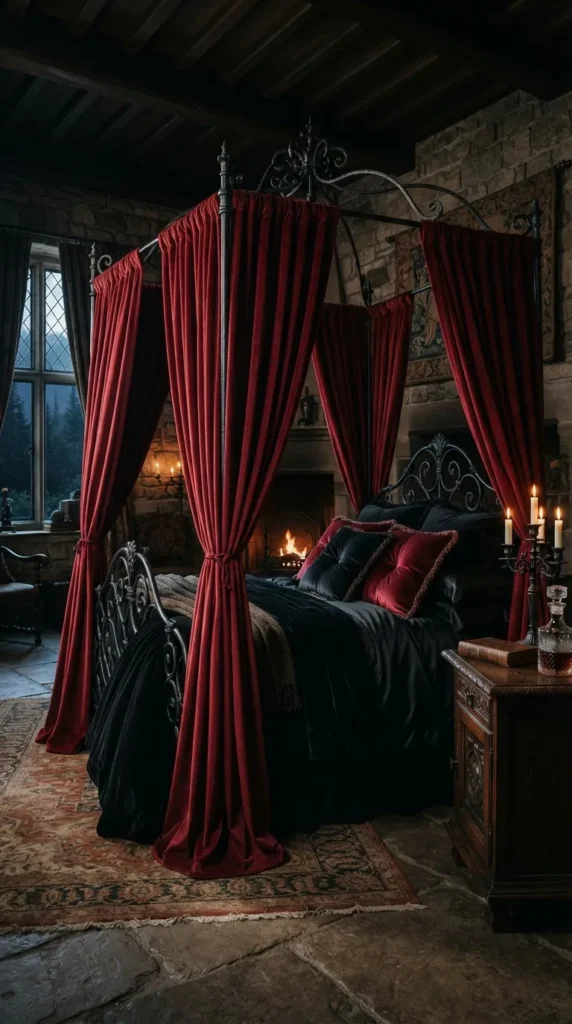
The centerpiece of any Gothic castle bedroom, a grand four-poster canopy bed draped in heavy crimson velvet brings historic regal luxury, warmth, and dramatic presence to your sleeping quarters.
What This Idea Means
In medieval castles, canopy drapes served both functional and decorative purposes—retaining heat within sleeping quarters while showcasing wealth and status. A heavy wrought iron canopy frame wrapped in rich crimson or blood-red velvet creates a cozy, romantic sanctuary within the room.
How to Make It
- Frame Selection: Source a heavy-duty black wrought iron four-poster canopy bed frame featuring pointed Fleur-de-lis or spear finials on the post caps.
- Fabric Preparation: Choose high-density, heavy-weight velvet fabric in deep crimson, wine red, or burgundy. Hem the top and side borders cleanly.
- Drapery Attachment: Loop the velvet fabric over the upper horizontal iron canopy rails, allowing the panels to cascade down all four corners.
- Tie-Backs: Gather the side velvet panels around the four iron corner posts using heavy braided gold or black tassel tie-backs anchored to wall hooks.
- Bedding Layering: Layer the bed with crisp black silk sheets, a heavy jacquard duvet, and multiple button-tufted velvet throw pillows.
Tips and Variations
- Tip: Line the back of the velvet panels with black blackout lining fabric to give the curtains substantial weight and prevent light bleed through the fabric.
- Variation: Swap crimson velvet for deep emerald green or royal purple velvet for an alternative jewel-toned color palette.
What You Need to Make It
- Black Wrought Iron Four-Poster Canopy Bed Frame
- Heavy Crimson/Burgundy Velvet Fabric Panels
- Black or Gold Heavy Tassel Tie-Backs
- Black Silk Sheets & Jacquard Duvet Set
- Heavy-Duty Sewing Thread & Pins
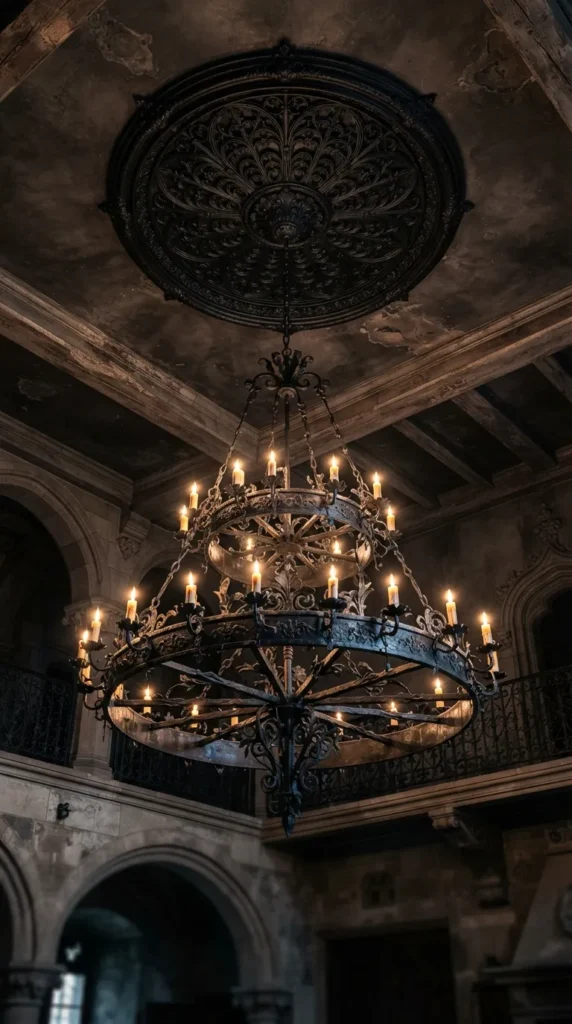
3. Hand-Forged Multi-Tiered Iron Wheel Chandelier
Introduction
Illumination defines the mood of castle interiors. An iron wheel chandelier suspended from heavy iron chains brings authentic medieval lighting and warm, flickering radiance to high-ceiling halls and dining rooms.
What This Idea Means
Medieval castle lighting relied heavily on forged iron rings holding clusters of beeswax candles. A modern iron wheel chandelier recreates this structural lighting focal point, drawing the eye upward while flooding the room with warm, ambient illumination.
How to Make It
- Ceiling Preparation: Locate a solid ceiling joist and install a heavy-duty metal junction box rated for heavy hanging light fixtures.
- Medallion Mount: Mount a carved polyurethane ceiling medallion painted in matte black or distressed bronze around the junction box.
- Chandelier Installation: Hardwire and suspend a multi-tiered black wrought iron wheel chandelier using heavy iron chain links.
- Bulb Selection: Install warm-dimming (2200K–2700K) LED flame-tip or candle-shaped Edison bulbs in every socket.
- Drip Details: Place faux-wax drip sleeves over the light sockets to emulate historical melting beeswax pillar candles.
Tips and Variations
- Tip: Put the chandelier on a smart dimmer switch so you can dial back the brightness to a soft, candle-like evening glow.
- Variation: Wrap subtle artificial dark ivy or dried trailing florals around the outer iron wheel frame for a rustic castle ruin look.
What You Need to Make It
- Multi-Tiered Black Wrought Iron Wheel Chandelier
- Ornate Polyurethane Ceiling Medallion
- Heavy-Duty Ceiling Junction Box & Hanging Chain
- Warm-White Flame-Tip LED Candle Bulbs (2200K)
- Smart Wall Dimmer Switch
4. Stone-Effect Venetian Plaster & Exposed Timber Beams
Introduction
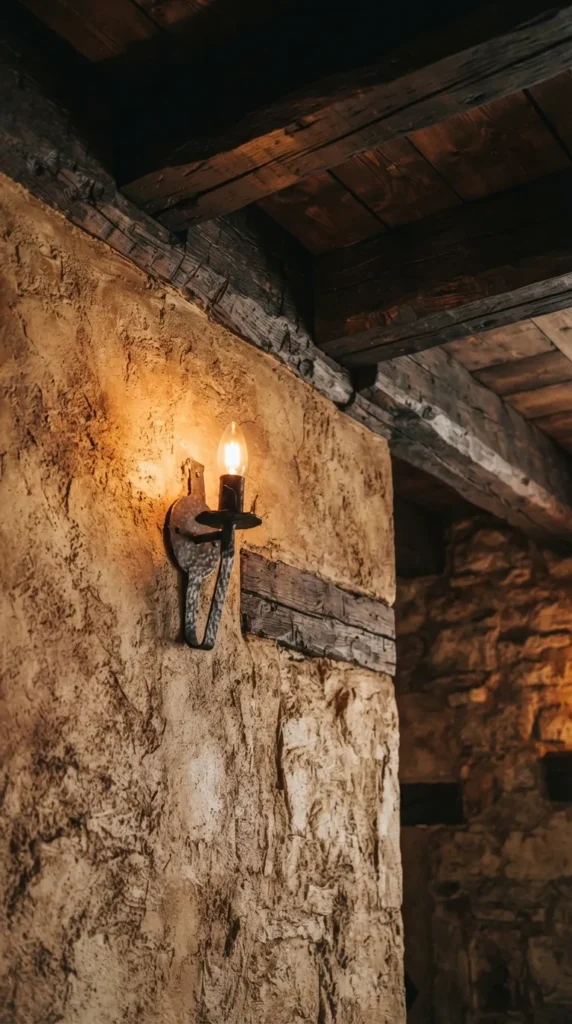
Transforming plain drywall into textured stone-like surfaces paired with dark stained ceiling timber beams gives modern living rooms the authentic, tactile feel of a medieval castle keep.
What This Idea Means
Castles were constructed from massive hand-carved stone blocks and heavy timber support beams. Recreating these textures using Venetian lime-wash plaster and faux polyurethane dark oak ceiling beams removes cold modern drywall surfaces in favor of historical architectural depth.
How to Make It
- Wall Primer: Clean drywall surfaces thoroughly and apply a grit-infused masonry wall primer.
- Plaster Application: Apply a dark gray or charcoal Venetian lime-wash plaster base coat using a wide stainless steel trowel in random cross-hatch strokes.
- Secondary Texture: Trowel on a second, slightly lighter slate-gray plaster coat while the base is tacky, leaving subtle texture pockets and stone-like color variations.
- Burnishing: Burnish the wall with a clean trowel held flat to smooth raised ridges while retaining tactile depth.
- Ceiling Beams: Mount lightweight polyurethane faux-wood ceiling beams stained in deep dark walnut or Jacobean black across the ceiling plane.
Tips and Variations
- Tip: Work in manageable 4×4-foot sections to maintain a wet edge while blending plaster tones.
- Variation: Install dark wood wainscoting panelling along the lower third of the wall, reserving the stone plaster finish for the upper wall area.
What You Need to Make It
- Lime-Wash Venetian Plaster System (Base & Top Coats)
- Grit-Infused Masonry Primer Coat
- Stainless Steel Venetian Plaster Trowels
- Polyurethane Faux-Wood Ceiling Beams
- Dark Walnut Wood Stain & Construction Adhesive
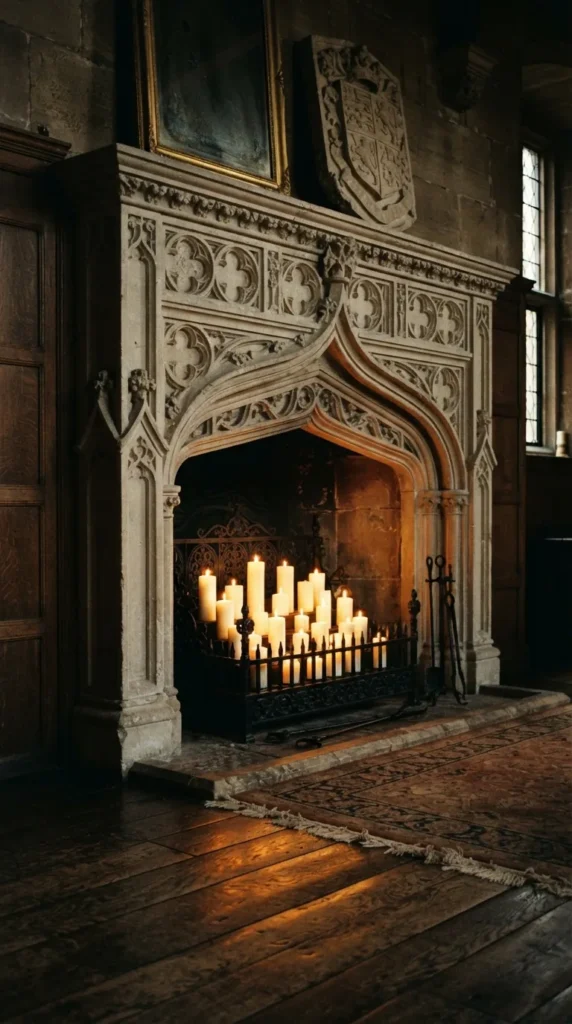
5. Medieval Tracery Stone Mantle with Pillar Candles
Introduction
A cast stone fireplace surround featuring sharp pointed arches and hand-carved medieval tracery creates an immediate architectural anchor in a Gothic castle hall or library.
What This Idea Means
The hearth was the physical and social center of any medieval castle. A massive stone surround featuring lancet arch cutouts, quatrefoil carvings, and a deep hearth opening brings structural weight and historic storytelling into modern living spaces.
How to Make It
- Select the Surround: Choose a pre-cast limestone or composite stone mantle kit featuring Gothic architectural motifs like pointed arches and carved spandrels.
- Prepare Wall: Ensure the hearth wall is structurally sound and cleared down to studs or masonry.
- Install Legs & Header: Set the cast stone jambs (legs) using thin-set mortar and stainless steel wall ties. Set the heavy arch header atop the legs, checking level carefully.
- Attach Mantle Shelf: Place the top mantel shelf across the header, anchoring into studs and sealing all joints with stone-matched grout.
- Style the Hearth: Place a heavy black iron candle grate inside the hearth cavity, arranging 9 to 15 ivory pillar candles of varying heights across the grate.
Tips and Variations
- Tip: Coat the inside of the firebox with flat black high-heat stove paint to create a clean, moody backdrop behind candle arrangements.
- Variation: Fill the empty hearth cavity with stacked dark birch logs or polished black river stones instead of candles.
What You Need to Make It
- Cast Limestone or Composite Gothic Mantle Kit
- Thin-Set Mortar & Stone-Matched Grout
- Stainless Steel Wall Tie Brackets
- Black Iron Fireplace Candle Grate
- Assorted Ivory Pillar Candles (Real or Flameless LED)
6. Cathedral Rose Window Decorative Wall Mirror
Introduction
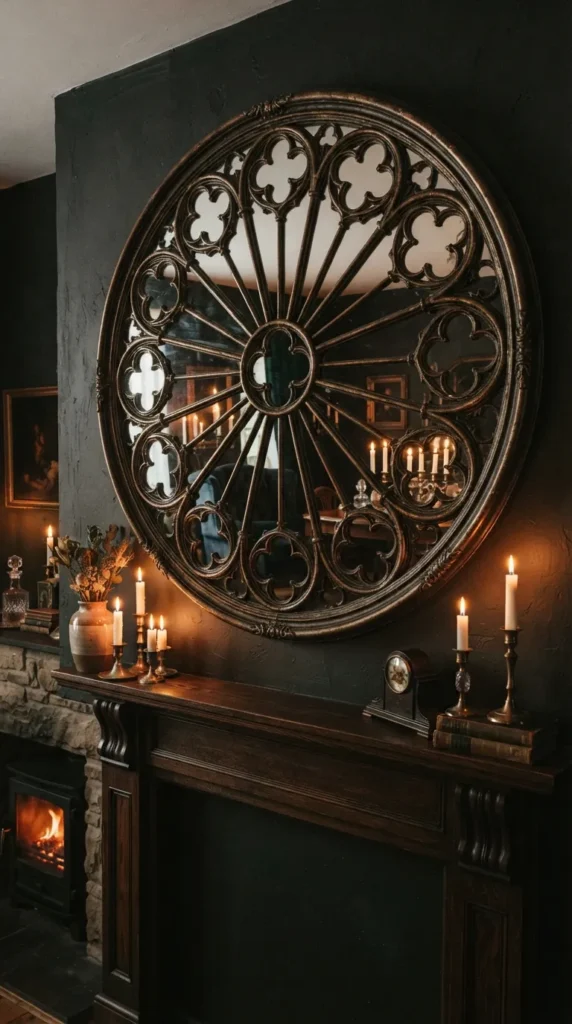
Inspired by the grand stained-glass rose windows of medieval cathedrals, an intricate rose window mirror serves as a dramatic, light-reflecting focal point above a fireplace mantle or entry console.
What This Idea Means
A rose window mirror translates complex stone wheel tracery into a decorative feature. It combines geometric radial symmetry with gothic flair, capturing ambient room light while adding historic elegance to dark walls.
How to Make It
- Acquire Frame: Source an ornate circular wooden or laser-cut MDF frame featuring radial geometric stone-tracery patterns.
- Finish Tracery: Spray paint the carved tracery frame in an antique bronze, aged iron, or distressed matte black finish. Once dry, dry-brush metallic silver or gold gilding wax over raised carved details.
- Assemble: Secure a custom-cut circular mirror pane into the rear inset of the frame using silicone adhesive and retaining clips.
- Antiquing (Optional): Apply glass antiquing spray to the mirror pane before assembly to give it an authentic 19th-century mercury glass patina.
- Mounting: Install heavy-duty D-ring wall hangers on the back and mount the mirror securely onto a wall stud using heavy anchors.
Tips and Variations
- Tip: Hang the rose window mirror directly across from a chandelier or window to maximize light reflection across dark wall finishes.
- Variation: Replace the mirror pane with leaded colored stained glass backlit by warm concealed LED strip lighting.
What You Need to Make It
- Carved Wooden or MDF Rose Window Tracery Frame
- Circular Glass Mirror Sheet
- Matte Black / Antique Bronze Spray Paint
- Metallic Wax Highlight Paste (Gilding Wax)
- Heavy-Duty Wall Anchors & D-Rings
7. Floor-to-Ceiling Tapestry Wall Hanging
Introduction
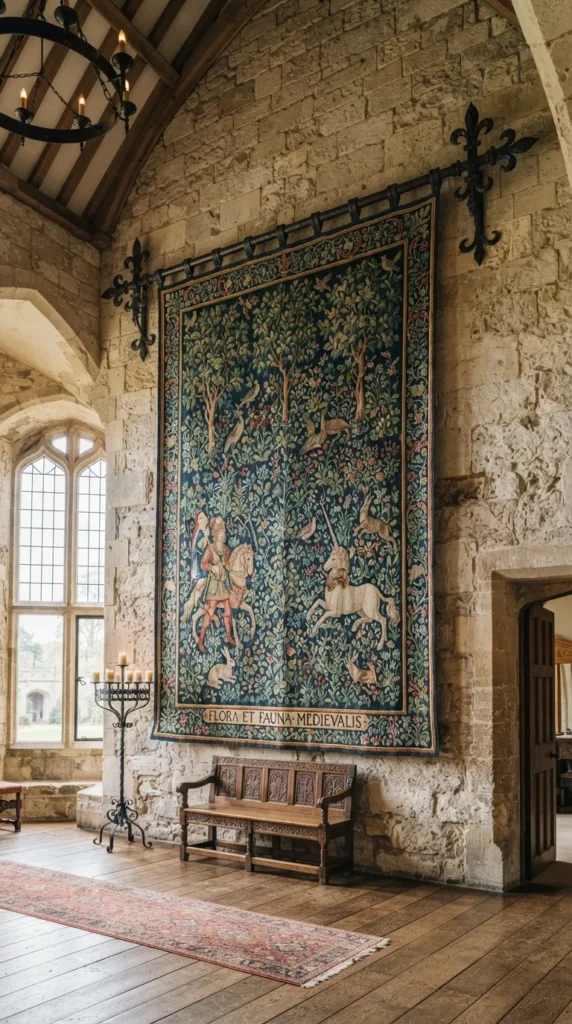
Hanging large woven textile tapestries featuring medieval hunting scenes, coats of arms, or moody floral greenery brings instant warmth, sound absorption, and historic color to stone walls.
What This Idea Means
In medieval castles, thick woven tapestries covered stone walls to block drafts, absorb echo, and display heritage storytelling. Hanging a large jacquard-woven tapestry provides acoustic comfort, soft tactile texture, and rich artistic color.
How to Make It
- Select Tapestry: Source a large jacquard-woven wall tapestry depicting medieval botanical scenes, unicorn legends, or coats of arms.
- Hardware Selection: Install a heavy-duty black wrought iron curtain rod with decorative Fleur-de-lis or spear finials high near the ceiling line.
- Rod Pocket: Slide the iron rod through the top rod pocket of the tapestry panel.
- Hanging: Mount the rod onto wall brackets, allowing the tapestry to hang perfectly plumb down the stone wall.
- Bottom Weight: Insert a slender wooden dowel into the bottom hem pocket of the tapestry to ensure it hangs flat without curling along the bottom edge.
Tips and Variations
- Tip: Steam-iron the tapestry thoroughly on the reverse side before hanging to remove all folding creases.
- Variation: Frame the tapestry on both sides with tall wall-mounted iron candle sconces for a gallery-style layout.
What You Need to Make It
- Jacquard-Woven Medieval Wall Tapestry
- Black Wrought Iron Curtain Rod with Gothic Finials
- Heavy Wall Anchors & Brackets
- Bottom Weighting Dowel Rod
- Garment Steamer or Steam Iron
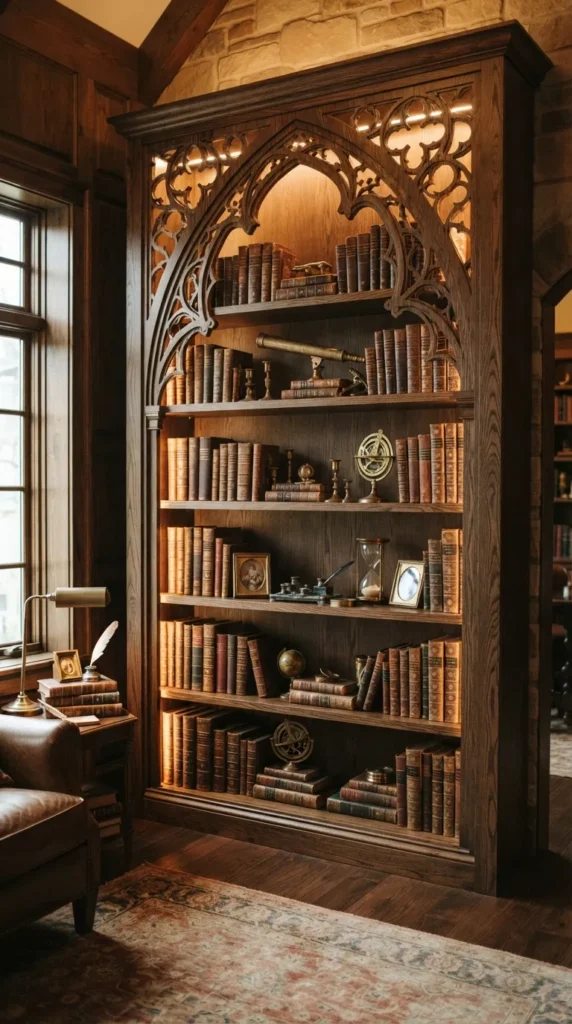
8. Gothic Arch Bookshelf Alcove with Backlit LED Tracery
Introduction
Integrating soft backlight LED strips behind custom cathedral arch bookshelf frames creates a dramatic glowing display for rare leather books, crystals, and vintage brass artifacts.
What This Idea Means
This idea bridges historic architectural silhouettes with modern accent lighting. Backlighting open tracery frames creates dramatic silhouette lighting, highlighting decorative objects while softly illuminating dark room corners.
How to Make It
- Bookshelf Framing: Build or modify a tall freestanding dark wood bookcase to feature pointed lancet arch upper shelf openings.
- Attach Tracery Overlays: Affix laser-cut wooden lancet or trefoil tracery panels inside the upper arch sections.
- Install Backlighting: Run warm-white (2200K–2700K) diffuse LED strip lighting inside aluminum mounting channels hidden directly behind the front arch trim.
- Wire Controls: Connect the LED strips to a smart dimmer switch or wireless remote control.
- Arrange Display: Line shelves with leather-bound books, brass astrolabes, dark ceramic vases, and natural crystal clusters.
Tips and Variations
- Tip: Use diffused LED aluminum channels with frosted covers to prevent visible LED dot reflections on glossy book covers or glass objects.
- Variation: Line the back wall inside the bookcase with dark red damask wallpaper or dark velvet fabric for extra texture.
What You Need to Make It
- Tall Dark Wood Bookshelf Unit
- Laser-Cut Wooden Tracery Overlay Panels
- Warm-White LED Strip Light Kit (2200K)
- Aluminum LED Diffuser Channels
- Smart Dimmer Switch & Decorative Objects
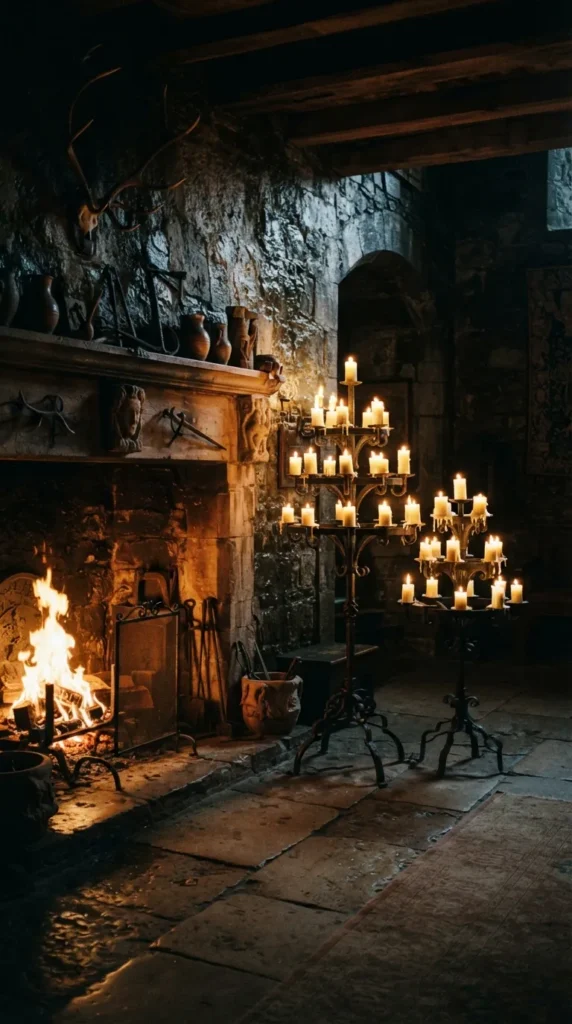
9. Heavy Wrought Iron Candelabras & Flying Buttress Sconces
Introduction
Multi-tiered wrought iron floor candelabras and wall sconces styled after structural flying buttresses bring romantic, flickering illumination to walls, hearths, and dining tables.
What This Idea Means
Gothic interiors rely heavily on low-level atmospheric lighting. Iron candelabras celebrate hand-forged metalwork while replacing harsh overhead fixtures with soft, dancing candle illumination.
How to Make It
- Fixture Selection: Choose heavy black wrought iron floor candelabras and matching wall sconces featuring curved support arms that mimic architectural flying buttresses.
- Mount Sconces: Mount wall sconces flanking doorways, mirrors, or tapestries, anchoring them securely into wall studs.
- Select Candles: Use tall, non-drip beeswax or paraffin pillar candles in ivory, blood red, or charcoal gray.
- Flameless Option: For everyday safety, substitute real candles with high-end LED wax pillar candles featuring realistic flickering flame effects.
- Drip Plates: Place brass or iron drip catchers beneath each candle socket to protect floor and table surfaces below.
Tips and Variations
- Tip: Group floor candelabras in clusters of three at varying heights near hearths or room corners to build dynamic lighting layers.
- Variation: Wrap subtle faux dark ivy or dried florals loosely around the iron arms of floor candelabras for a gothic ruin aesthetic.
What You Need to Make It
- Heavy Wrought Iron Sconces and Floor Candelabras
- Pillar or Taper Candles (Real Beeswax or LED Flameless)
- Wall Anchor Hardware & Screws
- Iron/Brass Drip Plates
- Lighter or Remote Control (for LED candles)
10. Distressed Black Oak Herringbone Parquet Flooring
Introduction
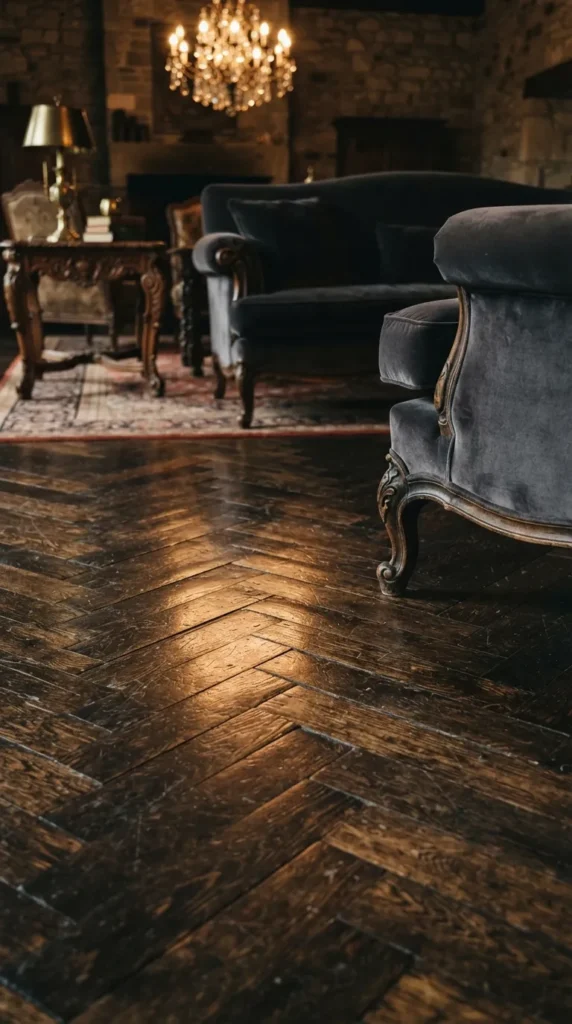
Dark, textured wooden floors laid in a classic herringbone pattern provide a grounded, luxurious foundation for heavy castle furniture and rich velvet textiles.
What This Idea Means
Flooring establishes the color palette and formality of a space. Distressed black oak herringbone flooring offers dramatic tone, subtle grain variation, and classic European pattern work that complements dark stone walls and rich fabrics.
How to Make It
- Subfloor Preparation: Ensure the subfloor is level, dry, and covered with a high-density sound-dampening underlayment.
- Establish Center Line: Snap a chalk line down the precise center of the room to align the herringbone pattern symmetry.
- Install Parquet Blocks: Lay tongue-and-groove black oak parquet blocks outward from the centerline at alternating 45-degree angles.
- Adhere Planks: Secure each block using full-coverage urethane hardwood flooring adhesive.
- Border Trim: Install a solid straight border plank around the perimeter walls to frame the central herringbone weave nicely.
- Seal Surface: Apply a matte polyurethane finish coat to protect the dark wood stain from scuffs and moisture.
Tips and Variations
- Tip: Choose engineered black oak rather than solid hardwood for better dimensional stability over radiant heating systems.
- Variation: Layer vintage washed Persian or damask rug runners in deep crimson and navy over dark floors to soften walking paths.
What You Need to Make It
- Black Oak Parquet Flooring Blocks
- Urethane Hardwood Flooring Adhesive
- Chalk Line & Level
- Flooring Saw & Tapping Block
- Matte Polyurethane Sealer
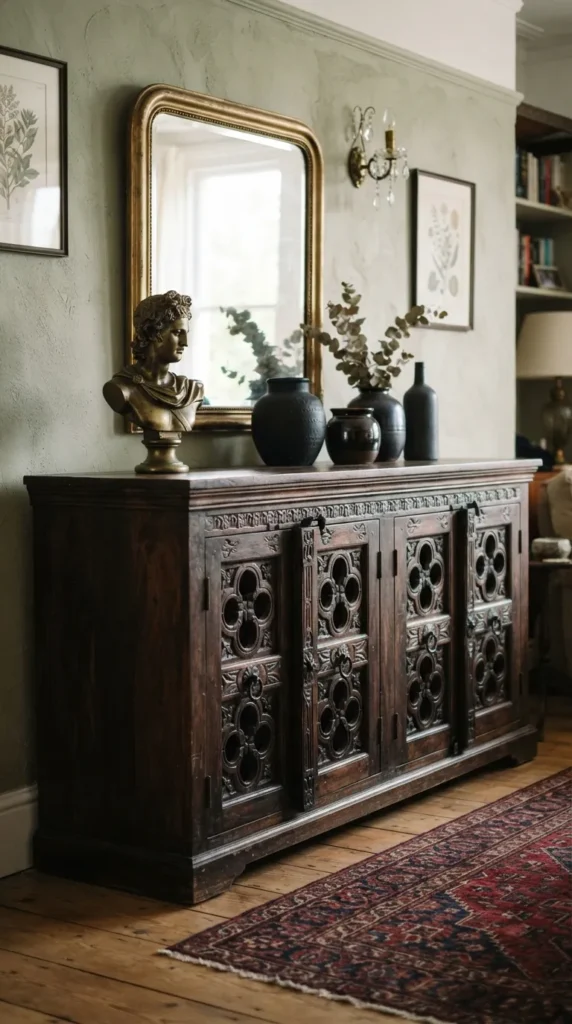
11. Carved Dark Wood Trefoil & Quatrefoil Furniture
Introduction
Selecting furniture pieces featuring hand-carved trefoil (three-lobed) and quatrefoil tracery cutouts infuses Gothic architectural forms directly into sideboards, cabinets, and dining chairs.
What This Idea Means
This approach ensures furniture acts as architectural artwork. Dark wood sideboards, cabinets, and high-backed accent chairs incorporating cutouts and relief carvings add tactile depth and historical craftsmanship to modern rooms.
How to Make It
- Source Furniture: Find vintage dark wood cabinets or high-backed dining chairs with solid wood construction.
- Add Tracery Appliques: If upgrading existing plain furniture, attach pre-carved wooden trefoil relief appliques onto door fronts or chair backs using wood glue.
- Refinish: Sand the entire piece lightly, then apply a rich espresso, ebony, or Jacobean dark wood stain.
- Distress Details: Lightly rub 220-grit sandpaper along carved raised edges to reveal subtle lighter wood undertones beneath.
- Hardware Upgrade: Replace standard knobs with heavy antiqued brass or wrought iron drop-ring pulls.
Tips and Variations
- Tip: Apply dark antiquing wax over carved grooves to deepen shadow lines and emphasize relief detail.
- Variation: Line the interior of carved cabinet doors with antiqued mirror glass or dark velvet backing fabric.
What You Need to Make It
- Solid Wood Sideboard or High-Backed Chairs
- Pre-Carved Wooden Trefoil Appliques
- Wood Stain & Antiquing Wax
- Iron Drop-Ring Cabinet Pulls
- Sandpaper & Microfiber Cloths
12. Regal Velvet Button-Tufted High-Back Throne Chairs
Introduction
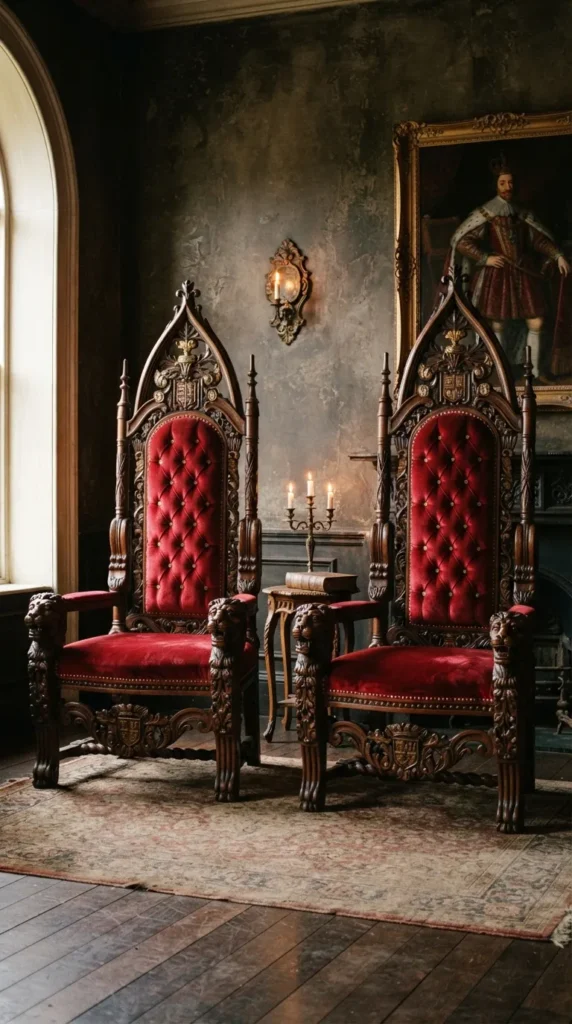
A pair of high-backed wooden chairs featuring tall pointed headrests, button-tufted velvet upholstery, and carved lion or gargoyle armrests serves as a grand seating statement.
What This Idea Means
High-backed throne chairs are iconic symbols of medieval and Gothic furniture design. Their exaggerated vertical proportion draws the eye upward, reinforcing room height while offering opulent, comfortable seating.
How to Make It
- Acquire Frame: Find vintage high-backed dining or accent chairs with pointed arch backframes.
- Refinish Frame: Strip existing varnish and stain the solid wood frame in ebony black or dark mahogany, sealing with a satin finish.
- Upholster Backrest: Add high-density foam to the backrest panel and upholster using rich jewel-toned velvet (e.g., deep ruby red or royal purple).
- Deep Button Tufting: Create classic diamond button tufting across the backrest using matching velvet-covered buttons and heavy upholstery twine.
- Finish Trim: Nail bronze or antique brass nailhead trim along the outer upholstery edges to conceal staple seams nicely.
Tips and Variations
- Tip: Use a curved upholstery needle and heavy waxed thread to ensure tufting buttons remain tight over time.
- Variation: Drape a real or faux-fur throw blanket casually over one armrest for extra warmth and tactile contrast.
What You Need to Make It
- High-Backed Wooden Accent Chairs
- High-Density Foam & Polyester Batting
- Heavy Velvet Upholstery Fabric
- Velvet-Covered Buttons & Tufting Twine
- Antique Brass Nailhead Trim & Mallet
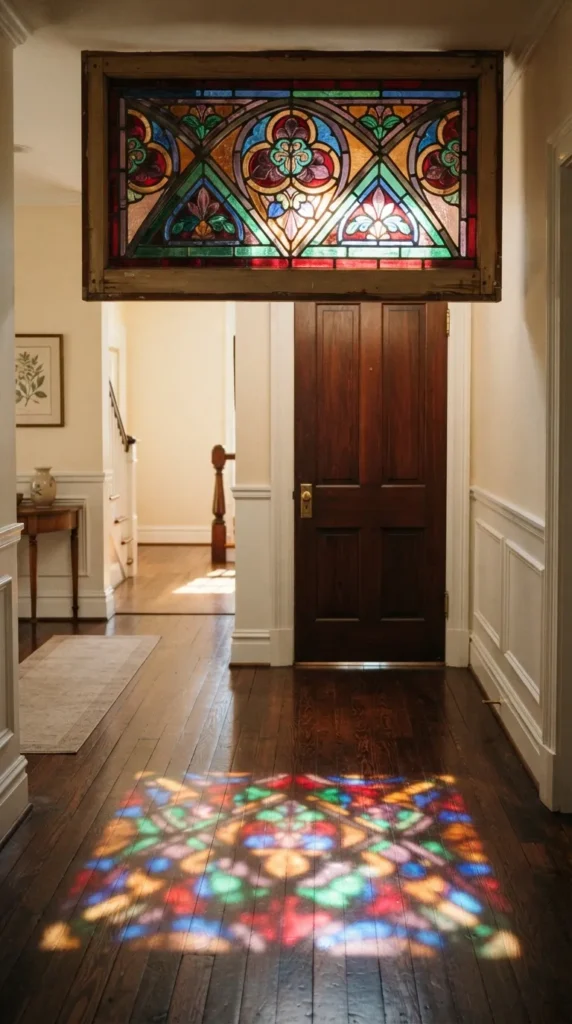
13. Stained Glass Transom Panels & Room Dividers
Introduction
Stained glass is synonymous with cathedral and castle architecture. Installing leaded stained-glass transom panels above interior doors or using them as hanging room dividers filters sunlight into jewel-toned rays.
What This Idea Means
This idea focuses on playing with natural light. Authentic or reproduction leaded glass panels in deep red, cobalt blue, amber, and forest green transform harsh daylight into moody, atmospheric room illumination.
How to Make It
- Acquire Panel: Source a vintage leaded glass window or commission a custom panel featuring Gothic trefoil or lancet geometric designs.
- Build Frame: Construct a protective wooden frame around the glass panel using hardwood strips.
- Option A (Transom Mount): Install the framed panel directly into the open transom space above an interior doorway.
- Option B (Hanging Divider): Attach heavy brass eye-screws to the top of the frame and hang it using decorative metal chains from ceiling beams near a sunny window.
- Seal and Finish: Paint or stain the wooden border frame to match existing room millwork.
Tips and Variations
- Tip: If authentic stained glass is outside your budget, apply high-quality translucent leaded-glass window film to existing clear glass panels for an identical visual effect.
- Variation: Add subtle warm LED backlighting behind the panel if hanging in a windowless room or hallway.
What You Need to Make It
- Leaded Stained Glass Panel
- Hardwood Framing Strips
- Brass Eye-Screws & Hanging Chain
- Clear Silicone Sealant
- Wood Stain or Paint
14. Heavy Velvet Drapery with Wrought Iron Cresting
Introduction
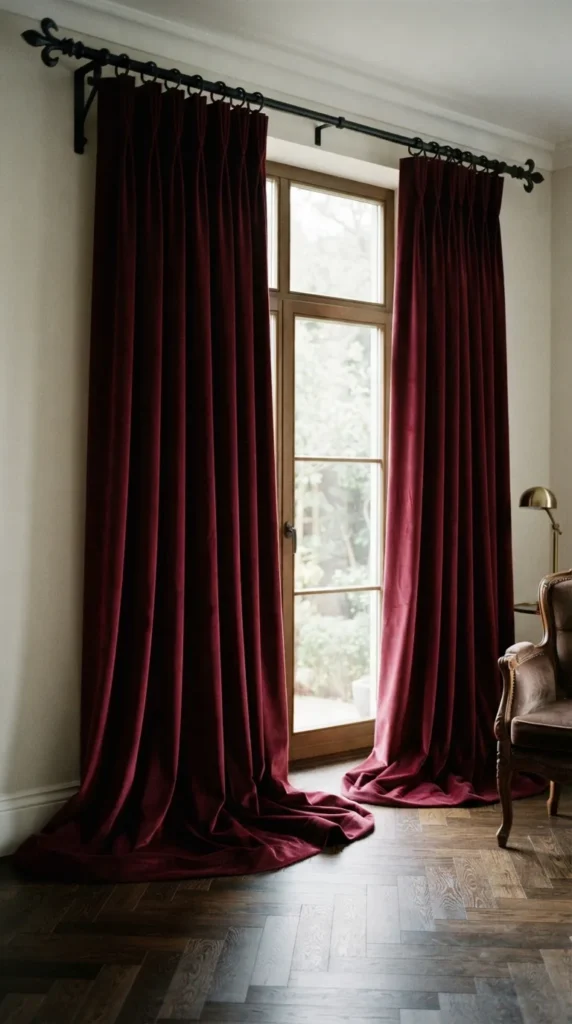
Dramatically tall velvet curtains topped with ornamental wrought iron cresting rods bring warmth, acoustic softness, and regal drama to high-ceiling windows.
What This Idea Means
Rich textiles are crucial to balancing the hard stone elements of castle design. Floor-to-ceiling heavy velvet drapery in deep jewel tones frames views like stage curtains, while wrought iron hardware with pointed cresting accents reinforces medieval craftsmanship.


How to Make It
- Install Hardware: Mount a heavy-duty wrought iron curtain rod high near the ceiling line, featuring decorative Fleur-de-lis or pointed spear finials.
- Select Fabric: Source heavy, high-density velvet panels in deep jewel shades like midnight navy, emerald green, burgundy, or obsidian black.
- Pinch-Pleat Top: Stitch or clip the top of the velvet panels into formal 3-prong pinch pleats for structured vertical folds.
- Hang and Pool: Hang the drapes so they kiss the floor or pool slightly (1 to 2 inches) onto the floor surface for extra opulence.
- Tie-Backs: Secure the drapes using heavy braided tassel tie-backs anchored to wrought iron wall hooks.
Tips and Variations
- Tip: Line the back of the velvet drapes with black thermal blackout lining to give the curtains weight, improve drape folds, and insulate the room.
- Variation: Add 4-inch wide metallic bullion fringe along the inner vertical edge of each curtain panel.
What You Need to Make It
- Wrought Iron Curtain Rod with Gothic Finials
- High-Density Velvet Curtain Panels
- Heavy Braided Tassel Tie-Backs
- Wrought Iron Wall Hooks
- Thermal Blackout Lining Fabric
15. Gothic Arch Entryway Console & Mirror Gallery
Introduction
Transforming an entryway into a cathedral foyer sets an immediate dramatic tone, pairing an arched console table with a gallery of pointed lancet mirrors.
What This Idea Means
Entryways provide the first visual impression of a home. Combining an open-frame gothic arch console table with a symmetrical arrangement of tall arched mirrors creates depth, structure, and cathedral-inspired welcoming space.
How to Make It
- Position Console: Place a narrow, tall console table featuring pointed arch leg supports against the main entryway wall.
- Mount Central Mirror: Hang a large, arched gothic mirror directly above the console center point.
- Flank with Sconces: Mount two black iron candle sconces on either side of the mirror for balanced symmetry.
- Layer Gallery Items: Add two smaller lancet-framed mirrors flanking the central mirror to create a 3-piece arch gallery.
- Decorate Surface: Top the console with a heavy stone bowl, a vintage brass bust, and tall dark candle holders.
Tips and Variations
- Tip: Keep table depth shallow (12 to 14 inches) to maintain wide, comfortable hallway walking paths.
- Variation: Place a dark velvet upholstered bench with pointed arch back carving under the console if space allows.
What You Need to Make It
- Gothic Arch Entryway Console Table
- Large Central Arched Wall Mirror
- 2 Smaller Lancet Accent Mirrors
- Pair of Wrought Iron Wall Sconces
- Decorative Stone and Brass Accessories
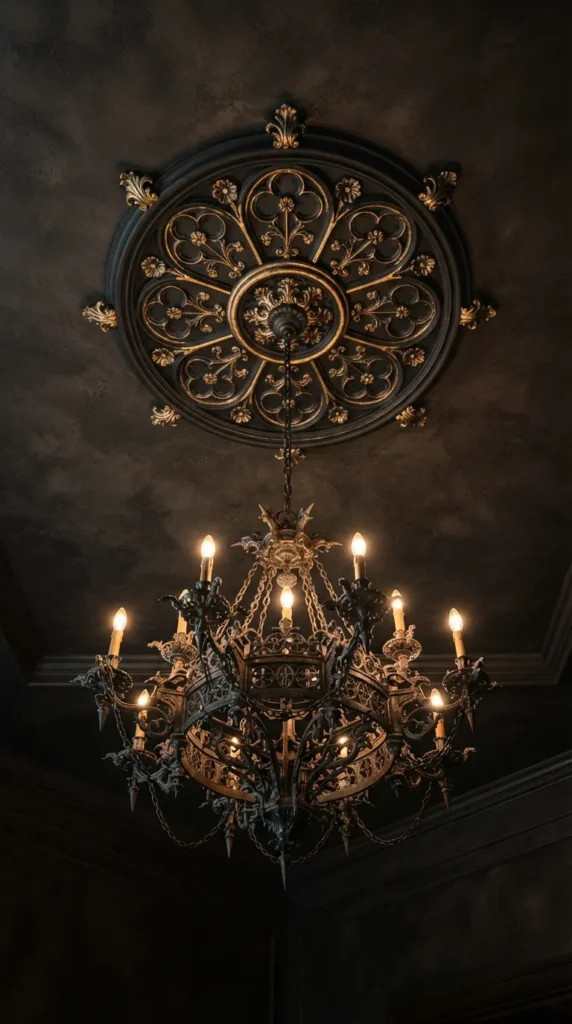
16. Ornate Ceiling Medallions & Bronze Chandelier
Introduction
An oversized, intricate ceiling medallion painted in dark moody tones serves as a dramatic crown for a heavy forged bronze or iron Gothic chandelier.
What This Idea Means
Ceiling medallion accents celebrate Victorian and Gothic revival plaster craft. By painting the medallion dark instead of traditional white, it becomes an architectural feature that anchors grand hanging light fixtures.
How to Make It
- Select Medallion: Choose an ornate 24 to 36-inch lightweight polyurethane ceiling medallion featuring acanthus leaf, trefoil, or gothic vine scrollwork.
- Paint & Patina: Spray paint the medallion in matte black or dark oil-rubbed bronze. Apply metallic bronze gilding wax over raised leaf details to create depth.
- Mount Medallion: Apply construction adhesive to the back of the medallion and screw it into ceiling joists around the electrical junction box.
- Install Chandelier: Thread the wiring of a heavy multi-arm bronze or iron cage chandelier through the medallion center and secure it to the junction box.
- Add Vintage Bulbs: Screw in warm, low-kelvin LED Edison bulbs or candle-shaped flame tip bulbs.
Tips and Variations
- Tip: Ensure the medallion diameter is slightly wider than the total width of your hanging chandelier for proper aesthetic proportion.
- Variation: Install two concentric medallions—a smaller one nested inside a larger outer ring—for extra ceiling dimension.
What You Need to Make It
- Polyurethane Ornate Ceiling Medallion
- Heavy Multi-Arm Bronze/Iron Chandelier
- Metallic Bronze Wax Paste (Gilding Wax)
- Matte Oil-Rubbed Bronze Spray Paint
- Construction Adhesive & Mounting Screws
17. Symmetrical Gothic Arch Alcove & Reading Nook
Introduction
Converting a recessed wall space or closet alcove into an arched reading nook creates an inviting, secluded sanctuary framed by architectural trim.
What This Idea Means
Gothic design excels at creating intimate, cozy retreats within larger rooms. Framing a recessed nook with a custom wooden pointed arch creates a quiet cathedral library atmosphere for reading and relaxation.
How to Make It
- Frame the Opening: Build a wooden pointed arch frame over the front header of a recessed wall alcove using plywood and flexible moulding.
- Build Bench Seating: Install a sturdy built-in wooden storage bench inside the alcove base.
- Add Upholstery: Top the bench with a thick, custom-cut velvet seat cushion in deep wine red or emerald green.
- Install Shelving: Mount recessed dark wood shelves along the interior side walls of the alcove to hold books.
- Add Overhead Light: Hardwire a small dimmable brass pendant light or sconce directly inside the apex of the alcove arch.
Tips and Variations
- Tip: Line the back wall of the reading nook with dark button-tufted velvet upholstery panels for added comfort and acoustic dampening.
- Variation: Install a velvet curtain rod across the inner arch line to close off the reading nook completely.
What You Need to Make It
- Plywood & Moulding for Arch Framing
- Built-In Bench Framing Timber
- High-Density Cushion Foam & Velvet Fabric
- Dimmable Pendant Light Fixture
- Recessed Wooden Bookshelves
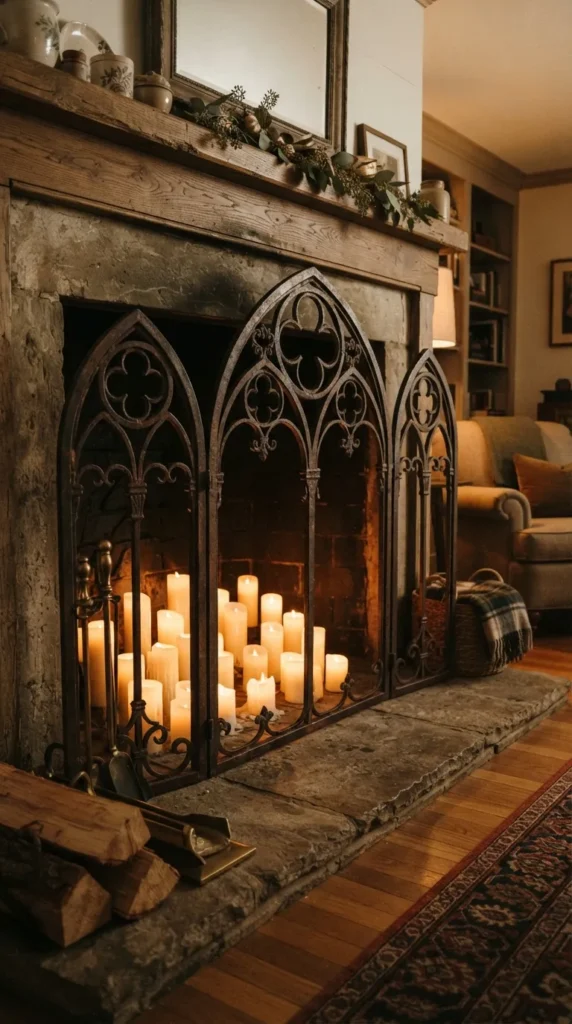
18. Cathedral-Style Fireplace Screen & Hearth Display
Introduction
A heavy wrought iron fireplace screen featuring intricate pointed arch tracery turns an idle hearth into a year-round architectural center point.
What This Idea Means
Fireplaces often sit empty during warmer seasons. A decorative iron screen with lancet tracery cutouts keeps the hearth looking refined, dramatic, and styled even without an active fire.
How to Make It
- Fit the Screen: Measure your fireplace opening and acquire a three-panel hinged wrought iron screen featuring gothic arch tracery.
- Position Screen: Set the screen flush against or slightly inside the stone fireplace opening.
- Style Interior Hearth: Place a large wrought iron pillar candle grate inside the empty fireplace cavity behind the screen.
- Arrange Candles: Arrange 7 to 9 white or ivory pillar candles of varying heights on the grate.
- Illuminate: Light the candles to let flickering flame shadows project through the iron tracery screen onto the surrounding floor.
Tips and Variations
- Tip: Spray the inside of your brick firebox with flat black high-heat stove paint to create a clean, moody backdrop behind the candle arrangement.
- Variation: Fill the firebox with stacked dark birch logs or polished black river stones instead of candles.
What You Need to Make It
- Wrought Iron Gothic Tracery Fireplace Screen
- Wrought Iron Candle Grate Insert
- Assorted Pillar Candles (Real or Flameless)
- High-Heat Matte Black Stove Paint
- Fireplace Tool Set
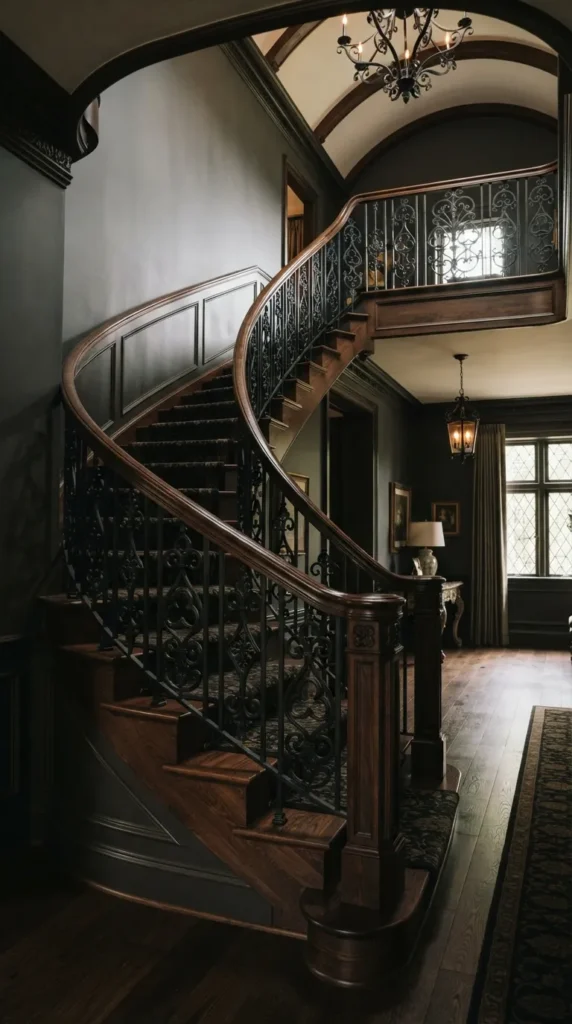
19. Black Iron Trefoil Balustrades & Staircase Rails
Introduction
Replacing plain wooden staircase spindles with custom black wrought iron balusters featuring trefoil and lancet scrollwork turns staircases into structural Gothic art.
What This Idea Means
Staircases are prominent architectural features in multi-story homes. Upgrading simple railings to dark hand-forged ironwork incorporating trefoil geometric knots adds historical character to entryways and hallways.
How to Make It
- Remove Old Spindles: Carefully unscrew or cut away existing plain wooden stair balusters.
- Select Iron Balusters: Source hollow or solid wrought iron balusters featuring central trefoil or double-lancet scroll inserts.
- Measure & Cut: Cut iron balusters to exact height using a metal saw or angle grinder.
- Install Shoes: Slide decorative iron mounting shoes onto the top and bottom of each iron rod.
- Secure Balusters: Insert balusters into pre-drilled holes in the stair tread and handrail, securing them with heavy-duty epoxy construction adhesive.
- Tighten Hardware: Slide mounting shoes down over the joints and tighten set-screws.
Tips and Variations
- Tip: Stain the wooden handrail and stair treads in deep dark walnut to contrast sharply against black iron spindles.
- Variation: Paint stair risers in flat charcoal and apply subtle stenciled damask or trefoil patterns in silver-gray paint.
What You Need to Make It
- Wrought Iron Gothic Trefoil Balusters
- Metal Angle Grinder or Hacksaw
- Iron Mounting Shoes & Set-Screws
- Two-Part Heavy-Duty Epoxy Adhesive
- Dark Walnut Wood Stain
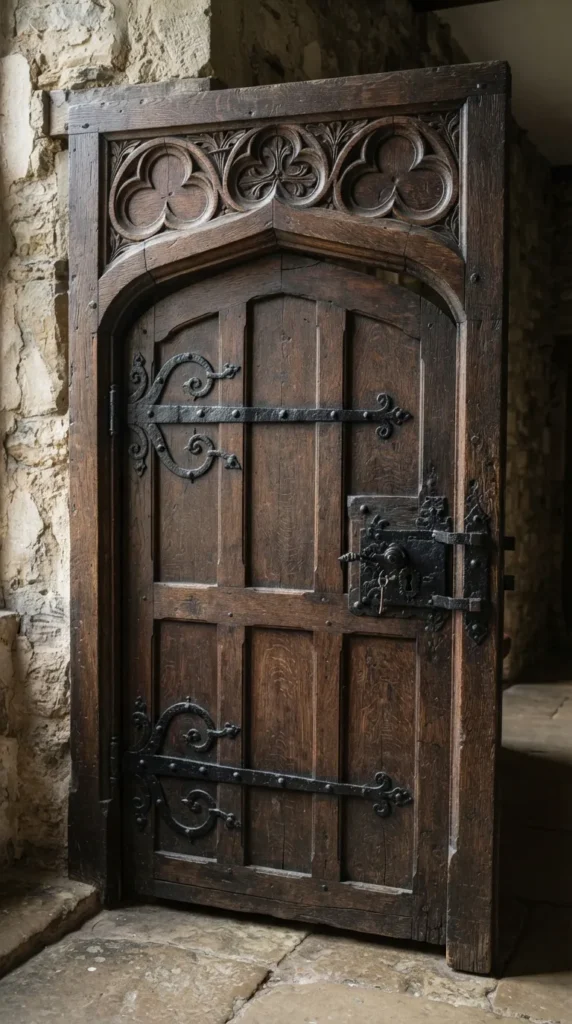
20. Carved Dark Oak Door Frames with Iron Hardware
Introduction
Upgrading standard interior doors with thick dark oak trim, carved arch lintels, and hand-forged black iron rim locks elevates everyday transitions between rooms into historical architectural moments.
What This Idea Means
Doors and passage frames are often overlooked in home decorating. Converting modern door surrounds into heavy, carved Gothic portals creates an authentic castle atmosphere throughout the home layout.
How to Make It
- Remove Standard Trim: Pry off thin builder-grade door casing trim carefully using a pry bar.
- Install Thick Casing: Install thick 4-inch dark oak casing boards around the door frame opening.
- Add Carved Header: Mount a decorative carved wooden lintel block featuring pointed arch relief or trefoil motifs directly above the door header.
- Install Iron Locks: Replace standard door knobs with black hand-forged iron rim locks, latch handles, and decorative strap hinges.
- Stain & Seal: Apply dark ebony or Jacobean stain to all new wood trim, matching existing baseboards and room millwork.
Tips and Variations
- Tip: Add decorative iron corner straps on the door corners to enhance the heavy medieval timber door aesthetic.
- Variation: Paint the door panel itself in a contrasting matte dark gray while keeping the surrounding oak trim deep black.
What You Need to Make It
- Heavy Oak Door Casing Boards
- Carved Wooden Lintel Header
- Hand-Forged Black Iron Rim Lock & Latch
- Decorative Iron Strap Hinges
- Dark Ebony Wood Stain & Varnish